Sunday, January 31, 2021

Best WordPress Calendar Plugin

Disclosure: This content is reader-supported, which means if you click on some of our links that we may earn a commission.

A calendar plugin for your WordPress site is a great way to ensure everyone is on the same page. If your business revolves around events, monthly announcements, or appointments, then you’ll want to manage it all with an easy calendar layout. 

You’ll be well on your way to being more organized, productive, and transparent with your customers once you find a calendar plugin that works well with your current workflow.

There are tons of calendar plugins out there, making it hard to know where to begin when picking the best one. Well, you’re in luck. Below I discuss some of the very best WordPress calendars you can start using today as well as how much it’ll cost you to use each one. Let’s dive in. 

#1 – Timetable Responsive Schedule — The Best For Displaying Daily And Weekly Time Schedules

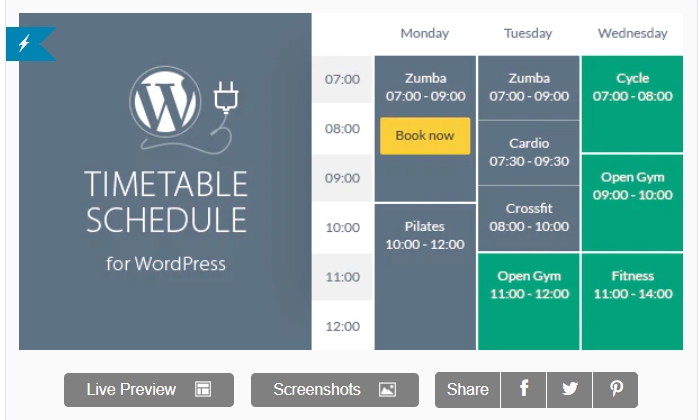
With Timetable, you can display an array of event calendars, schedules, and availability information all in one easy to use plugin. The name pretty much gives away what they’re best at, which is ensuring that your customers know your schedule down to the hour. 

With it, you can generate PDFs you or your customers can print for convenience. The events widget lets your customers know when, where, how, and what time your next event will be held.

Thankfully, Timetable doesn’t confine you to creating time blocked schedules and events. It also offers booking functionality. So you can book and fill your events accordingly.

Once you’ve downloaded the plugin, you can add a new event to your calendar, name it, adjust its settings, event hours, and event frequency, set dates, and publish. Once you’ve published it, copy the autogenerated shortcode and paste it anywhere you want to display it on your site. 

The best features of Timetable include:

  • Free lifetime updates so that your plugin will always be up to date and compatible with the latest WordPress updates
  • Fully responsive
  • Custom CSS option to modify it to match your brand look
  • Shortcode generator for display on any site page or blog post
  • Event filtering to easily search for specific event listings
  • Lots of customizable color options for events, days, event text, and more

Timetable Responsive Schedule is $29 for a regular license, which comes with future updates and six months of support. Get started with Timetable here. 

#2 – The Events Calendar — The Best For Multiple Calendar Views

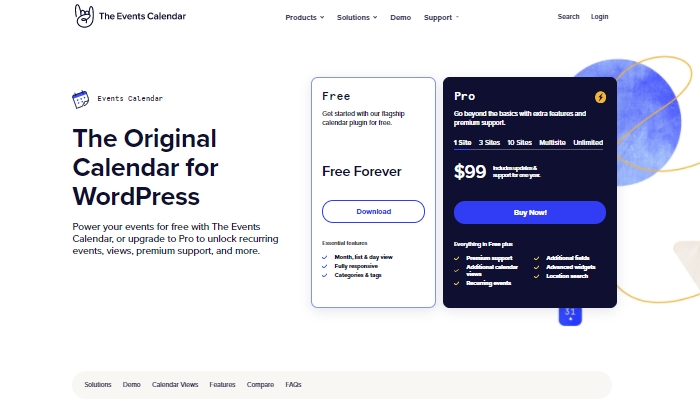
The Events Calendar will fit like a glove if you want access to multiple calendar views with plenty of powerful events and scheduling features that keep your community and customers engaged. 

Once you download The Events Calendar plugin and add all your event information, you can view your calendar in several different views, including monthly, daily, weekly, and more. 

Here’s a quick rundown of how you can view it:

  • Month View: Classic calendar view where you can see all events at a glance for the entire month
  • List View: Have your audience or prospective customers view your events in a chronological list that can be filtered by month
  • Day View: Have events happening on the same day? You can configure your calendar to display day views so you can easily see which events are happening at what time on the same day without any confusion.
  • Week View: See upcoming events for a week at a glance.
  • Photo View: Create a grid of chronological events displayed primarily as images. 
  • Map View: If your events are location-dependent, a map view can be a helpful visual aid.

A wide array of calendar views is only one standout feature of The Events Calendar plugin. Some of the top features of Events Calendar are:

  • Easily manage in-person and virtual events
  • Export and import other calendar events with a built-in CSV importer
  • Mindful of time zones, so all your customers are on the same page no matter where in the world they are 
  • Plenty of event category and tagging functionality
  • Build community with an event calendar designed to bring groups and organizations together
  • Multiple calendar views for accessibility and ease of use
  • The ability to highlight specific events to draw more attention to them
  • Easy set-and-forget recurring events once you define event parameters
  • Shortcode feature to embed and display any calendar, schedule, or event on any page or blog post
  • Compatible with Google Maps and Google Calendar

The base calendar plugin is entirely free forever and comes with the month, list, and day views, has categories and tags, and is fully responsive. The Pro version with additional features, support, calendar views, recurring events, and advanced fields is $99 for one site, $149 for three websites, and starts at $299 for 10 or more sites.

Start using The Events Calendar today for a more engaged audience. 

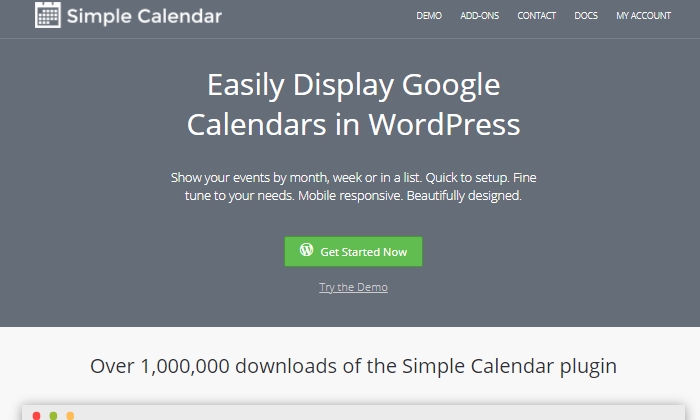
#3 – Simple Calendar — The Best For Use With Google Calendar

The perfect marriage between WordPress and Google Calendar is the Simple Calendar plugin. It’s no wonder it has been downloaded over one million times. 

You can easily display your events, schedules, bookings, and availability with their straightforward calendar. As you might have guessed, there’s a reason why “simple” is in the name. Because it truly strives to be exactly that.

Simple Calendar lets you show monthly, weekly, or list views with the most important updates you can manage through Google Calendar. It also offers a widget view if you want to display your calendar in your site’s footer or sidebar. 

If someone comes across your event and wants to add it to their own Google Calendar, Simple Calendar lets them do that with an “Add to GCal” link option. Because of Simple Calendar’s convenience and compatibility with Google Calendar, I recommend it as the best calendar plugin if you’re already using Google Calendar to manage your events. If you’re unsure about the plugin, you can always try their instant demo. 

Some features of Simple Calendars include:

  • Fully mobile responsive
  • Color-code events to your taste
  • Manage events on Google Calendar and have them automatically displayed on your WordPress site
  • Integrates with Events Calendar Newsletter for sending event reminders

The pricing is straightforward and breaks down like this:

  • Personal — $49 for up to 1 site
  • Business — $79 for up to 5 sites
  • Agency — $149 for up to 25 sites

All plans come with one year of support and updates. Download and start using Simple Calendar today. 

#4 – Events Schedule — The Best For Versatile Calendar Styles

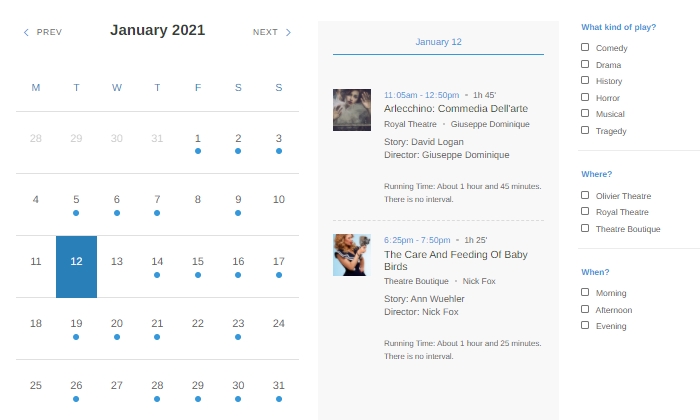
Events Schedule is a solid WordPress calendar plugin in terms of versatility. They offer 12 customizable schedule styles, each with different features.

With list views, monthly views, and weekly views, you can ensure your audience has plenty of access and time to plan for future events. The advanced event filters also let your audience easily find the events they’re looking for without confusion or hassle. 

Because of Events Schedule’s versatility and wide array of calendar types, it’s easily usable in just about any industry. You can use it to schedule fitness classes and events, publish theatre schedules, Museum timetables, arena events, or bar events, just to name a few. 

Top features of Events Schedule:

  • Compatible with WooCommerce
  • Includes a booking system
  • Able to integrate with Google Maps
  • Easily schedule repetitive events
  • Countdown timer feature included
  • Intuitive visual schedule builder
  • SEO friendly code and display options optimized for speed
  • Shortcode generator option for simple plug and play
  • Custom call-to-action buttons feature

If you want to try Events Schedule before clicking the buy button, I recommend you take your time to look through their live demo, where you’ll get to see the look of each schedule, what industry it’s best for, and how to put it together and publish it on your WordPress site. 

If you pair this plugin’s price point with the number of calendar options it offers, it makes for an impressive package worth diving into if you want to go beyond the basics of what a calendar plugin can do. A regular license costs $39 and includes six months of support and future updates.

#5 – EventON — The Best For Colorful And Dynamic Event Calendars

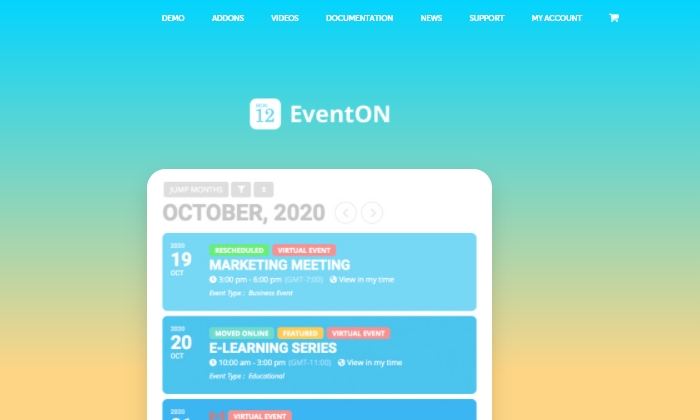
EventON is a powerful calendar plugin that stands out with dynamic and colorful calendar displays you can customize to your liking. As soon as you set eyes on any calendar created with the EventON plugin, it’s sure to be absolutely eye-catching.

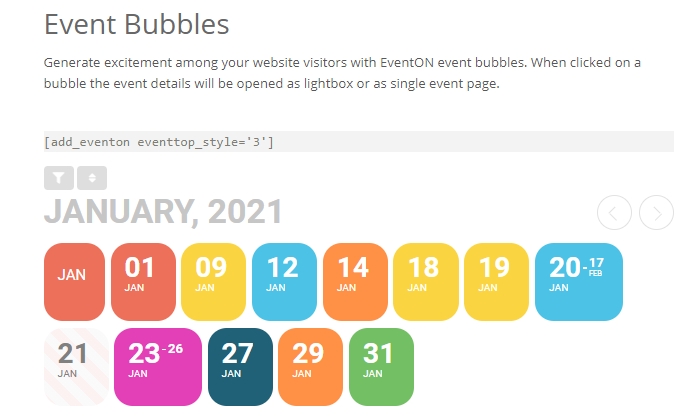
With EventON, you can create colorful calendar bubbles that, when clicked, open up to display a calendar card with every event detail they need to know. 

Event bubbles aren’t the only view available to you once you download their plugin. You can create tile calendar views with bigger calendar “tiles” that display each of your events with readily available details. Don’t worry, once you set up your calendar tiles, they’re designed to be fully responsive, so they’ll look good on any screen.

You can also display calendar events in a list view with thumbnails and add any number of event colors for each tile. Like other robust plugins, EventON isn’t a one-trick pony. There are plenty of useful features it offers to users, especially if you host lots of live events. Read on below to learn more about some of their very best features. 

Some of the best features of EventOn are: 

  • Generates shortcodes you can quickly grab and plug in with Gutenberg
  • Great for hosting virtual live events
  • Developer friendly for advanced feature altering capabilities
  • Expandable calendar details for each event 
  • Add unlimited images to each event to better inform your audience
  • Has “add to Google Calendar” options for increased engagement
  • Easily filter and sort events with a few clicks
  • Add custom repeat events so you can set it and forget it
  • Easily change custom time formats to display according to your preferences

EventON costs $25 for a regular license, which includes future updates and six months of support. You can also get support extended to 12 months for an additional $7.50. Get started using EventOn’s colorful calendar features here. 

What I Looked At To Find The Best WordPress Calendar Plugins

There are tons of calendar plugins available. But not all of them offer the same features, as some cater to different user needs better than others. Here are a few things I considered when researching the best WordPress calendar plugins and factors you should consider when deciding which is best for your business. 

Visual Layout

To cover the basics, a solid WordPress calendar plugin is mobile responsive. It’ll always adjust to any screen it’s viewed on, no matter the size. They’re also easy on the eyes and accessible. 

The last thing you want to do is use a calendar plugin that looks outdated, has limited functionality, or doesn’t play well with your website’s other plugins. The more you can create a visually appealing calendar easy for anyone to use, the more you’ll get out of it when using it as a business management tool.

Booking and Appointment Options

Some calendars are designed to be very simple so that you can display important dates and events. Others are created with bookings and appointments in mind.

This means you won’t only be able to display availability but that your customers can book appointments right on your calendar at any time. If you run a service-based business, this can be a great option to look into when choosing the right calendar plugin. 

Simplicity

You want to find a plugin that falls in the sweet spot between simplicity and advanced features depending on your business needs. You don’t want to spend the money to buy a robust plugin with lots of heavier features if you won’t even use a third of them.

On the other hand, you don’t want to use a plugin that limits your capabilities when it comes to booking appointments, displaying dates, automating and marking holidays off, or even providing a useful legend.

Conclusion

A WordPress calendar plugin can prove useful in keeping your business productive, staying organized, and keeping your customers happy and informed. 

Here’s a recap of the plugins I reviewed in this guide to help you make the best choice:

Use this guide to choose the best WordPress calendar plugin according to your needs. Then come back and leave a comment below with any feedback on your favorite calendar features. 

The post Best WordPress Calendar Plugin appeared first on Neil Patel.

Saturday, January 30, 2021

Best WordPress Backup Plugins

Disclosure: This content is reader-supported, which means if you click on some of our links that we may earn a commission.

What would happen to your WordPress site if all your data was wiped out? If you don’t have a clear answer to this pretty important question, then you’ve landed in the right place.

Without a doubt, a WordPress backup plugin is one of the smartest things you can do to ensure your site’s life. If you get hacked, accidentally lose your password, or the world comes crashing down, you’ll save yourself the massive headache of losing everything on your site with a backup plugin. 

The best part is that backup plugins are pretty easy to use once you add them to your WordPress dashboard. The problem lies in choosing the right one for your business from a list of so many plugins. In this buying guide, we’ll dive deep into everything you need to know. Ready? Let’s make sure your site’s backed up. 

#1 – BlogVault — The Best All-In-One Backup Solution

BlogVault makes for a reliable all-in-one backup plugin that ensures your site’s backup is stored securely in the cloud. It’s used by over 4,000,000 websites and trusted by businesses like Astra, Cloudways, and GoWP. 

BlogVault’s plugin offers key storage features like changelogs that can help you identify problematic modifications to your website. They go as far as providing 90-day archives to ensure you recover from any site mistakes, which are bound to happen at some point in your site’s lifetime.

If your site experiences downtime, with BlogVault, you can make it so that your site’s backup still shows up to users. What exactly does BlogVault backup? Everything from the basics like blog posts, your media library, and media files to blog comments, plugin files, WordPress settings, categories and tags, theme settings, WordPress core files, and even user details.

Because of how complete and robust BlogVault is as a plugin, it’s one of my favorite backup plugin recommendations to make. 

Some of BlogVault’s best features are:

  • Provides centralized dashboard where you can manage multiple sites
  • Provides custom WooCommerce table backups
  • Performance checks that inform you about site speed and ways to improve your site
  • Get uptime and downtime status checks
  • Handy customer support that gets in contact with you in less than 24 hours
  • Incremental backup option available so the plugin doesn’t slow down your site

If you’re not in love with everything BlogVault offers yet, take a look at their affordable pricing tiers:

  • Personal — $7.40 per month for daily backups
  • Plus — $12.40 per month for daily backups
  • Advanced — $20.75 per month for real-time backups

You can definitely take them for a test drive with their free trial. Otherwise, get started using BlogVault here. 

#2 – JetPack — The Best For Making Site Changes Safely

Jetpack is a strong contender for a reliable backup plugin that works great for making site changes safely.

Picture this: You’re making exciting new changes to your site, whether that’s CSS customization, adding new plugins, or altering your core site files. Then suddenly, something breaks. With Jetpack, you can quickly restore your site to how it was before you made that crucial mistake with just a few clicks. This makes it an easy and reliable plugin to work with if you’re constantly updating your website. 

The Jetpack plugin even comes complete with a mobile app so that you can virtually restore your website right from your phone no matter where you are. Plus, Jetpack offers plenty of security features, too. This can only be a plus for a backup plugin and makes it worth keeping in your corner.  

Some top features of Jetpack include:

  • Provides malware scanning and protects your site from spam
  • Downtime monitoring lets you know if your site is down immediately
  • Malicious hacking and attack protection
  • Mobile app you can take and use with you everywhere
  • Automatically cleans up spam comments off your site

If you choose to go with JetPack, the question becomes what kind of pricing package you’ll feel comfortable going with, as there are many options.

The three main packages are:

  • Backup Daily — $7.95 per month billed yearly 
  • Security Daily — $19.95 per month billed yearly
  • Complete — $79.95 per month billed yearly

The Backup Daily tier offers automated backups, one-click restores, and unlimited site storage. On the other end, Complete provides the full Jetpack suite, including real-time security, enhanced search, CRM features, and even design tools. 

Jetpack also offers a limited free forever plan that includes basic site protection, downtime monitoring, and changelogs. 

Additional product bundles you can purchase separately on a per month basis include a Security Real-Time plan, a Real-Time Backup plan, a Scan package, an Anti-spam bundle, a Site Search plan, and the CRM Entrepreneur add-on.

Jetpack offers peace of mind by providing one-click restore options and monitoring your website’s security at pretty affordable rates. Still, I recommend you visit their comparison page to ensure you’re deciding on the right backup bundle. 

Start using Jetpack’s powerful backup features here. 

#3 – UpdraftPlus — The Best Free Backup Plugin

If you’re looking for a free backup plugin, look no further than UpdraftPlus. It makes restoring all your site files hassle-free and straightforward. It has over 3,000,000 active installations and is a reliable backup option if you are running your site on a shoestring budget.

UpdraftPlus has a paid version you can upgrade to with a lot more features and capabilities. But for now, we’ll focus on what the free version can do for your site.

UpdraftPlus is a cloud-based plugin that ensures you have access to your site’s files and data in case of cyberattacks, server crashes, conflicting plugins, or anything else that would bring your site down. Once you upload the UdraftPlus plugin, you can set it up, forget it, and let it run in the background while you work on more important tasks for your business. 

Best features of UpdraftPlus:

  • Backup to an exhaustive list of cloud options
  • Lets you set up automated backup schedules for convenience
  • Uses less server resources than other free backup plugins
  • Has the ability to restore your site 

Updraft Plus is free, and you can read reviews and download it here.

#4 – Backup Buddy — The Best For Efficiently Restoring Your Site

Like Backup Buddy rhetorically asks on their site, “What good is a backup if you don’t also have a way to restore your site properly?”

And they couldn’t be more right. Backup Buddy ensures you always have the latest backup of your site by providing you with a zip file you can use to upload and restore a broken site. 

Once uploaded, Backup Buddy seamlessly walks you through the steps to get your media files, text, plugins, and more back up and running. Additionally, you can choose to restore individual files instead of restoring the whole site if that’s what you want to do. You can even schedule automated backups at intervals you customize. 

Some top features of Backup Buddy include:

  • Backs up your entire WordPress installation
  • Customizable backup content that you can pick and choose to restore
  • Offers hourly, twice daily, daily, biweekly, weekly or monthly backups
  • Automatically sends your backup files to accessible remote storage locations like Dropbox or Google Drive

Backup Buddy has three pricing options, all with one-time fees:

  • Blogger — $80 for one site
  • Freelancer — $127 for up to 10 sites
  • Gold — $199 for backing up unlimited sites

You can quickly sign up and get started with BackUp Buddy here. 

#5 – WPvivid Backup Pro — The Best For Migrations

WPvivid Backup Pro is a great backup plugin you can safely set up and start using to migrate your site. They’ve been used on more than 90,000 websites to do more than just back up and safely migrate data files.  

WPvivid Backup Pro offers incremental backups to ensure it isn’t slowing down your site as it works in the background to backup all your data once it’s been configured to your needs. As far as its backup migration capabilities, WPvivid Backup Pro supports manual migration methods, as well as auto migration and migration via remote storage (as a premium feature). 

Some of WPvivid’s best features include:

  • Create either manual or scheduled backups
  • Advanced migration features in case you want to migrate your site quickly
  • The ability to create a staging site
  • It backs up all your core WordPress files
  • 24/7 ticket support
  • Set a size limit for files that you’re not interested in backing up

Here’s a quick look at their pricing packages: 

  • Basic — $49 per year for up to three websites
  • Freelancer — $99 per year for up to 100 websites
  • Ultimate — $149 per year for unlimited websites

All three plans are annual subscriptions, unlike other backup plugins, many of which are a one-time licensing fee. WPvivid also offers a 14-day free trial, visiting so you can test it out before you purchase a plan. 

What I Looked At To Find The Best WordPress Backup Plugins

The most basic use of a backup plugin is to keep updated backups of your site continuously. There are plenty of plugins on the market that will do just that.

Here are some of the criteria I looked at to find the best plugin options for your WordPress site. These will be helpful factors for you to think about as you choose which plugin to invest in. 

Restoring Options and Complete Backups

If you’re frantically trying to get your site back up and running and want to restore it to how it was before it crashed, you’ll be thankful for a restoring option you can upload in minutes.

This way, you’re enabled to troubleshoot fast, save your rankings in search engines, and have a contingency plan for when things go south. It’s a great feature to look for in any backup plugin you decide to use. Especially if their pricing features hook you into yearly subscriptions.  

Along with quick restoring options, it’s a good idea to ensure your backup plugin does complete backups, meaning it backs up everything on your site from images to texts, themes, media files, and your whole database. If your entire site goes down, a partial backup will be less useful. Full backups are worth any extra cost. 

Preventative Overload Configuration

It’s always a plus to know that a plugin was built to work with your site and not against it. This means it was designed with every aspect of your site in mind. This includes not overloading your site so that it slows down or has trouble loading.

Some of the best backup plugins allow for interval backups, configured so that your site doesn’t suffer from slow loading times. As you probably know, load time is a crucial SEO factor that Google takes seriously as it decides where to place you in SERPs. The fewer resources your backup plugin takes up, the better your chances of ranking on search engines. 

Cloud Storage

This brings me to cloud storage as a desirable feature in a backup plugin. It can be both a cost-effective and scalable option to give you peace of mind. 

With cloud storage, you can store all your site information safely with your backup provider, where you’ll always have access to your data within minutes. This also helps you minimize storage overhead and have easy access.

Bringing It All Together

Using a reliable WordPress backup plugin is one of the best ways to keep your site safe while you sleep soundly at night. In the scenario that you lose everything on your site, meaning your files, images, blog posts, guides, PDFs, and more, you’ll want to be able to bring all of it back with a few clicks. That’s where backup plugins come in.

To summarize the plugins I reviewed in this guide, take a quick look at the list below:

Take a moment to check out each one so that you’re comfortable with your final plugin choice. If you’re unsure, make sure to revisit this guide whenever you need it. 

Now it’s your turn. Which plugin do you use to backup your sites? Comment below!

The post Best WordPress Backup Plugins appeared first on Neil Patel.

Friday, January 29, 2021

5 SEO Tips For Bonanza E-Commerce Sellers

5 SEO Tips For Bonanza E-Commerce Sellers

As an e-commerce seller, your business depends on your relationship with search engines.

Search engines are one of the first stops potential buyers make before purchasing an item. When your store is invisible to search engines, you simply don’t exist to the vast majority of your audience.

It’s a concerning thought and one reason e-commerce sellers spend so much time fixing and maintaining their on-site SEO.

Of course, understanding your platform is critical if you expect to stand out. If you’re serious about gaining that SEO edge, you need to know how search engines interact with your platform.

That’s where Bonanza comes in. It’s a great platform if you’re trying to avoid crowded, oversaturated sites like eBay and Etsy.

This article explores how Bonanza works and shows you how to drive traffic to your store from search engines. 

What is Bonanza and How Does it Work?

As a platform for e-commerce sellers, Bonanza exists as a marketplace for all kinds of products. 

The sheer variety of products you can sell on Bonanza is impressive. Bonanza lets merchants sell art, books, coins, jewelry, and everything in between. 

What Is Bonanza and How Does It Work

Bonanza functions similarly to many other e-commerce platforms. Sellers pay fees on both the price of the goods sold and the shipping fees associated with that purchase. However, you don’t pay unless your items sell—there are no listing fees or subscription costs. 

You can advertise on the platform, but for our purposes, we’re going to focus on how to drive organic traffic to your business using SEO.

5 SEO Tips for Bonanza E-Commerce Sellers

To increase views on Bonanza, you need to provide customers with the most relevant information at the right time. Let’s look at how to optimize your Bonanza listings to drive organic traffic.

Use Strong Keywords in Bonanza Listings

As with all types of SEO, effective keyword usage is paramount when optimizing for Bonanza. But, before you can use keywords in your title and listing, you need to figure out what your keywords are.

Google Keyword Planner is a fantastic tool for testing the strength of specific key terms and phrases that you’re considering for your content.

Bonanza - Use Strong Keywords in Bonanza Listings

Let’s say your e-commerce store revolves around hiking. The word “hiking” itself might be a perfect fit for your content, but this presents a few problems. 

The biggest issue here is hundreds, if not thousands, of other merchants selling hiking equipment on Bonanza. There’s little chance your content will stand out to either the algorithm or potential buyers based on that term alone.

Instead of using a broad keyword like “hiking,” you can use a strong keyword phrase that accurately describes your product. Suddenly, you’ve narrowed down your audience significantly.

Your audience is no longer anyone who types in “hiking” in a search engine. 

You sell hiking boots to people actively looking for sales. By narrowing your focus to keywords related to that, you’re telling search engines your site is useful to a particular group of buyers. The more specific the solution, the more likely these search engines are to recommend it.

Don’t just look for keywords with high search volumes—seek out phrases that naturally fit into your site and signal genuine value.

By the way, if you’re looking for more in-depth keyword analysis, you can use my Ubersuggest tool for free here.

Bonanza - Use Ubersuggest for Keyword Research

Include Quality Images

Discussions on SEO tend to revolve purely around the text. But, believing search engines only look at the text on your site would be a serious mistake.

The images on your site send data to search engine algorithms and can signal a higher quality experience for users.

Remember, search engines are in the business of having the right answer. When your business becomes the best possible fit for a potential buyer, search engines may give you the spotlight.

Image quality is essential. Take clear, well-lit pictures of your items with backgrounds that don’t distract. Use multiple images from different angles so your audience can fully see what they’re considering purchasing.

After you’ve taken your photos, change the file names to match your content. If you used a picture of a national park for your hiking store, don’t just call it DMG_33223.jpg. Change its name to something appropriate and relevant, such as hiking_boot_brand_style_name. 

Make sure your image dimensions match the image size as displayed. This can impact load times for your site, which can have a dramatic effect on your on-site SEO.

Additionally, use the right format for your visual content. If you want to preserve background transparency, use PNG. Logos and icons should use SVG. For larger photos, use JPEG. This option preserves the image’s colors and clarity while taking up less storage space.

Speaking of which, reduce the file size of your images! If you’ve ever wondered why your pictures take so long to load, this is likely the culprit. Slow load times mean less attention from search engines.

Images also have alt text (or alt tag). Essentially, this is the information conveyed to users who can’t see pictures. Whether they’ve disabled images or they’re using a screen reader due to a visual impairment, alt text helps provide information on that image.

Search engines use alt text to vet the quality of a site. This means if you don’t have alt text (or you do, but it’s nonsensical), you’re probably missing out on free traffic.  

Choose Your Item Titles Carefully

When shopping online, you likely see a lot of products with titles that are a list of keywords rather than a clear title like you’d use on, say, a blog post. This isn’t the way to go.

I’ve found a simple way to help e-commerce sellers understand the value of item titles. 

Think about your store from a search engine’s perspective. Your site description is pretty similar to an article or blog post as far as they’re concerned. Search engine algorithms see everything as content, and they want to provide positive experiences for users.

If you created a blog post on hiking titled “hiking positives why you should hike how to like hiking,” would a search engine find that valuable? Of course not. You’d probably title that post something like “Making the Most of Hiking” or “The Awesomeness of Hiking.”

For articles and blogs, you likely already take the time to build compelling, relevant, engaging content regularly because you know how valuable it is to both a search engine and your audience.

Do the same for your store listings—research using the Keyword Planner. Run a competitor analysis and see which titles excel and which are failing.

Above all, your item title and product descriptions need to be helpful. When they’re helpful, they’re valuable— and when you’re valuable, search engines are more willing to pay attention. 

It’s also worth noting paying attention to the differences in the buying cycle. Online shoppers with low buyer awareness need lots of convincing. For example, a buyer that searches for “hiking boots” may still be researching their options and not yet ready to buy, while someone who searches for “Women’s Newton Ridge Waterproof Amped Hiking Boot” is likely ready to buy.

If they aren’t familiar with your product, you’ll need to focus on education first.

Start with key features, product usage, and brand guarantees. This makes your product copy both user-friendly and valuable.

Add Product Features and Benefits

Now that we’ve established that product descriptions function like any other piece of content, it’s time we broke down how to craft a valuable description. 

Start with product features. From an SEO perspective, potential buyers are searching for perks and features when they use search engines. 

After all, they aren’t just looking for “boots.” They’re looking for “high-quality, comfortable boots.” 

The mistake some sellers make is assuming the list of features is enough. That list is just one piece of the puzzle. What makes a product description stand out to a search engine’s algorithm is contextually appropriate copy. 

These aren’t just high-quality, comfortable boots. They’re boots that stand up to the harshest of winters. They’re boots you can wear for hours on end. Maybe they are waterproof. 

While Bonanza allows you to fill out boxes with item traits and listing details, they also give you space to write out a description. Provide details you couldn’t give in the boxes.

For instance, you can put the boots’ size and material in the traits, but you can’t tell them the heel height. Put that type of information in your written description.

When you create a clear picture of the experience with a particular product, you bring a high level of authenticity to the shopping experience. 

If your content checks some of the keyword boxes but isn’t valuable, your site won’t get organic traffic for long.

Grow Using Content Creation

One of the most frustrating challenges you’ll deal with as an e-commerce seller is being unable to innovate. As a business owner, you want every business-building tool at your disposal. Which brings up the question: at what point do you start to expand your marketing efforts?

After all, you don’t just want to beat your competitors by a small margin. You want to dominate your e-commerce space and have your site on the first page of a user’s search engine results.

Commit to creating a blog for your site. It doesn’t have to be fancy, but it should be value-driven. 

You could use a free option like WordPress.com and write two articles a week on topics your audience cares about—and link to relevant items in your Bonanza store. You’ll have over 100 articles in a year, all linking to your Bonanza store, which shows search engines a series of healthy links to your store.

Bonanza - Grow Using Content Creation

More high-quality links mean validation, plus there’s the added perk of adding another layer to your marketing funnel. 

You can even use this content to collect email addresses for your newsletter. Use that to drive repeat business, and before you know it, you’ve built a truly profitable ecosystem. 

Conclusion

SEO is just as crucial for e-commerce stores like Bonanza as it is for other types of content. Without solid SEO for your store, consumers probably won’t find your products.

Understand what users need from their search experience. Take the time to create a user-friendly product page. Offer engaging content and create a store that puts the customers’ needs first.

You’ll never be able to “trick” search engines. But with enough patience and hard work, you can get search engines to work for you and drive traffic to your Bonanza store.

How have you found success on Bonanza?

The post 5 SEO Tips For Bonanza E-Commerce Sellers appeared first on Neil Patel.

How to Dominate Google in 2021

how to dominate google in 2021

SEO is becoming harder and harder.

It takes longer to rank and you have to spend more money to get results.

The reality is, you can’t wait forever to get results, and you have no choice but to leverage SEO because everyone else is doing it.

So, what should you do?

Well, the first thing you need to do is adjust how you think about SEO.

SEO isn’t only about rankings. To be honest, I don’t even track them for my own site. It’s about getting the right kind of traffic.

You know, the visitors who are ready to buy.

Instead of teaching you how to rank for competitive terms, which is going to be even more difficult in 2021, I’m going to break down a formula that will give you much faster results and sales in this ultra-competitive environment.

Best of all, I am going to break it down into four steps as I know you don’t have the time to do everything.

Here’s the four step SEO strategy that will help you dominate Google rankings in 2021:

Google Ranking Step #1: Attract Customers Before They are Ready to Buy

The most expensive keywords to go after are buyer intent keywords. You know, the ones where someone types in a keyword and is ready to spend money right then and there.

That will always be the case. Not just from an SEO standpoint, but even a pay per click standpoint.

So should you ignore these valuable keywords?

Of course not. More so, you have to go after them no matter how long it takes to rank. You just have to be patient.

In the short run, there are other keywords with similar search patterns. Now, they aren’t as lucrative because they are more informational related.

Here’s the kicker: People research before they buy. If you can grab those searchers at the start of the journey, you can get their clicks (and purchases) for little to no money.

So how do you find the keywords that aren’t as competitive that have a similar search pattern?

Use Ubersuggest (and the accompanying free Chrome extension as you look through SERPs).

Here’s how it works:

Let’s say you are selling beard oil but you know the term is competitive and will take you a lot longer to rank for than you have.

Ubersuggest will show you all of the terms people search for on Google that has a similar search pattern to the term “beard oil.”

In other words, think of it as Google Trends in reverse. With Google Trends, you type in a query and it shows you how well the term performed over time. Using Ubersuggest, you get a list of queries that have a similar trend pattern to the main keyword you want to rank for.

In other words, if you know the term “beard oil” will cause a sale, Ubersuggest will show you other terms that match the same pattern (some keywords will be relevant while others will not).

Type in “beard oil” or the term you want to rank for into Ubersuggest, then click “Keyword Ideas.” It’ll show you a list of related suggestions, but some of those terms still have pretty high intent–not quite what we are looking for.

Click “Related.”

Here’s what I got:

ubersuggest dominate google

As you can see from the image above, people type in terms like best beard oil. Other terms include beard oil vs balm, what does beard oil do, and beard oil recipes.

If you write in-depth blog content about those phrases, you’ll appeal to a similar audience. Some of those keywords may not cause a sale right away, but what we’ve found over and over again is that if you write content related to your main subject, a lot of your blog readers will come back within a few weeks and purchase.

That’s how most people generate their sales from content marketing.

You don’t even have to write blog content, you can just create new landing pages targeting those new keywords.

Most people who sell beard oil probably don’t focus catching those top of the funnel terms.

Google Ranking Step #2: Land and Expand

Everyone focuses on ranking for new terms. But there is an issue, it’s hard to rank for new terms.

Even though SEO has a huge ROI, it’s a strategy that requires patience.

Here is the thing: you can get results faster if you use the land and expand strategy.

Here’s how it works. Log into Google Search Console. Next, click on “performance” and you will see a list of terms that you currently rank for:

search console keywords dominate google

Then I want you to click on one of the most popular terms you already rank for and then click on pages.

You should see a report that shows you the URL that ranks for the term on Google. You need this URL because you will be modifying this page.

search console pages dominate google

Now I want you to take that term and put it into Ubersuggest. Once the report loads, click on “Keyword Ideas” in the navigation. You’ll see a report that will look something like this:

ubersuggest keywords dominate google

You’ll see a laundry list of long tail phrases. Take the ones that are buyer-intent related and add them to the page that already ranks for the head term.

When adding the long tail phrases, make sure you adjust your content to be relevant to those keywords. And pick the ones that are highly related to your product or service. Just stuffing them into your page without adjusting the content is spammy and won’t provide a good user experience to searchers.

What you will find is that because you are already ranking for the head term, typically you will shoot to page one within 30 to 60 days for the long-tail variation by adjusting your content. It’s a quick win!

But the key to this strategy is to pick the right longtail keywords. Don’t just look at traffic numbers, focus on terms that you know will cause a sale or a lead.

Google Ranking Step #3: Build a Brand

Google has been placing more emphasis on brands. In other words, if you have a strong brand, you’ll rank faster.

When I really started focusing on brand building, my traffic went from 240,839 in June 2016:

june traffic build a brand for google rankings

To 454,382 in August 2016:

aug traffic dominate google

As the Ex-CEO of Google said:

Brands are the solution, not the problem. Brands are how you sort out the cesspool.

In other words, if you want to succeed on Google in the long run, you have to build a brand. As your brand grows, your search traffic will as well.

The way to monitor your brand growth is Google Trends. Type in your brand name into Google Trends as well as a few of your competitors to see how you are stacking up.

google trends how to dominate google

Sadly, there isn’t a quick hack to skyrocket your brand. There is, however, a formula that works for both personal and corporate brands.

What is the formula?

You do something bold!

Sure people can tell you to blog, speak at conferences, run ads; but none of that helps you build a brand that has a loyal following because everyone else is already doing the same things (or trying at least).

What your competition isn’t doing is being bold. If you want a brand like Tony Robbins or Apple, bold is the way to go.

So how do you do something that is bold?

Well, let’s first start with a personal brand (although I recommend that you build a corporate one instead).

Do the Opposite

When it comes to building a personal brand, you’ll have to take the opposite approach of most people in your space. Whatever is working for them won’t work for you.

No one cares for the copycat, especially when they are satisfied with the original solution.

In other words, if you do exactly what your competitor is doing no one will care to follow you.

Let me give you examples of how to do the opposite of your competition:

  • Genuinely help people: A lot of people blog and participate on social media, but how many people take the time to respond to their community? As far as I can tell, less than 1%. Just look at me. For years, I’ve responded to comments on my blog, Facebook, and even YouTube. Most people don’t take the time; doing the opposite has helped me build a connection. And if you are wondering why I do this it’s because when I started out I had no money and people helped me. I’m just trying to do the same.
  • Writing 10x content: When I got into blogging, everyone was doing it. So I had to find a way to separate myself. I did this by writing in-depth guides–not those 5,000-word blog posts, I am talking about 30,000-word guides. On top of that, I spent money on the design so they would look beautiful.
  • Creating video content: when I got into the digital marketing community, there were already large conferences that had thousands of attendees. I thought speaking at all of them would help my brand, and they did to some extent, but I was just another speaker. Very few people in my space were creating video content. So now instead of giving speeches at conferences, I give them on YouTube, Facebook, and LinkedIn. I reach more people without having to travel and the content lives on forever (and is available for free to everyone!).

That’s how I stood out from my competition and built a personal brand. Then I did it for years because brands aren’t built overnight.

If you aren’t sure on how to do the opposite of your competition when it comes to your personal brand leave a comment and I’ll try and give you some ideas.

Now let’s go into building a brand for your company. It all comes down to one thing:

Be Bold

No matter what you are selling online you have competition. It doesn’t matter if you are a B2B or a B2C business, you have competition, which means it is going to be hard for your brand to stand out.

So, how do you differentiate yourself?

You do so by being bold.

Let me give you an example. In the United States, there are tons of options for cell phone carriers. So how do you stand out when everyone offers the same phone and competitive pricing?

Well, T-Mobile separated itself by offering free Netflix, unlimited data, and free roaming.

tmobile how to dominate google

And you don’t have to be a big company to do something bold.

When Zappos started selling shoes they decided to do a few things differently. First, they offered a refund policy that lasted 1 year. Just think about that–if you return a shoe to them 12 months later, the chances are it’s out of style and they won’t be able to resell it.

zappos how to dominate google

Then they decided to randomly upgrade their shipping. So instead of ground shipping, they would randomly upgrade you to two-day or next-day air.

Amazon crushed their competition the moment they rolled out their Prime program. When it first came out, you would get free 2-day shipping on all Prime products for just $99 a year. What a ridiculously amazing offer.

Now that’s being bold!

Being bold doesn’t have to break your bank account. You don’t have to do something like Amazon and T-Mobile; it can be as simple as providing amazing customer service when you are in an industry that’s known for terrible support.

If you are unsure of how you can be bold with your business, leave a comment and I will try and give you some ideas. Make sure you provide an overview of your business so I can give you halfway decent ideas. 😉

Of course, being bold won’t build your brand overnight (it takes years) but you should see growth each quarter. If you aren’t, that means you aren’t being bold enough.

Google Ranking Step #4: Build a Better Mousetrap

A mousetrap? Why would you want to build a mousetrap?

Link building is still important. Sure, Google is looking at many other factors now, but link building still helps with rankings.

But it is harder to build links than it used to be back in the day. Everyone is blogging… heck, there are over 440 million blogs and over a billion if you count Tumblr, Medium, and WordPress.com.

Yes, that means there are more sites to hit up and ask for a link but everyone is doing that.

So how do you build links when everyone is getting those spammy emails asking for a link, such as the one below?

spammy links guide to dominate google

You have to build a better mousetrap. Something so amazing that everyone wants to link to it without you asking.

It used to be detailed guides but seeing 10,000-word guides that have fancy designs are more common these days than when I started creating them.

They still work, especially when it comes to brand building, but they just aren’t as effective when it comes to link building.

Same with infographics, they used to get tons of social shares and links (they still do to some extent), but they aren’t as effective as they used to be.

So what kind of mousetrap do you need to build? You could start off with something that people are used to paying for.

For example, the consulting firm Price Intelligently released a free analytics software called ProfitWell.

With very little marketing, they were able to generate 943 backlinks from 187 domains.

profitwell guide to dominate google

I also did this with Ubersuggest.

ubersuggest tool guide to dominate google

I put in more effort into marketing, so I was able to generate 10,667 unique backlinks.

ubersuggest links dominate google

A great example in the consumer space (this would do wonders for e-commerce sites as well) is animated infographics. Everyone has seen infographics, so Aminagraffs decided to make their infographics animated, which caused them to go viral.

Here’s part of their infographic that breaks down how a car motor works.

car motor guide to dominate google in 2021

Best of all, the Amimagraphs founder didn’t do any marketing; the graphic just spread. Even with no marketing, it generated 751 backlinks from 136 domains and over 200,000 visitors.

car backlinks guild to dominate google

If you want to use old-school link building tactics, you can, they just won’t help you as much in 2021. So, get creative and build a better mousetrap.

When you build a good mousetrap, you may be worried about cost. But there is a different way to think about it:

How much would you be spending on marketing to get the same results?

People make fun of me for what I am doing with Ubersuggest and think it is silly that I can “lose” $150,000 or so a month. But if I had to buy that traffic, it would cost me much more than $150,000. Even though my mousetrap is expensive, it is still cheaper than paid ads.

You don’t have to go as far as me. Doing what Animagraffs is affordable. I paid them $750 to create an animated infographic for me. I’m not sure what they charge these days, but I bet you can find someone on the web who will do it for a few hundred bucks.

Conclusion

Instead of thinking of SEO in the traditional sense, I want you to shift your strategy.

SEO is only going to get harder, Google is going to continually change their algorithm in ways you may not like. But one thing is for certain: the traditional way of doing SEO will get you results, just not in the timeframe you want.

So, follow the four steps above. They are unconventional, but the industry is so competitive and saturated that you have no choice but to think outside of the box.

So what other unique strategies are you going to leverage in 2021?

The post How to Dominate Google in 2021 appeared first on Neil Patel.

Best Social Media WordPress Plugins

Disclosure: This content is reader-supported, which means if you click on some of our links that we may earn a commission.

Social media plays a crucial role in the success of any brand or business. By integrating your website with social media platforms, it helps expand your reach and drive engagement. 

One of the easiest ways to improve your social media strategy is by using a WordPress plugin. These tools make it easy for website visitors to share your content via social media and ultimately drive more traffic to your website. You can even use these plugins to get more followers on social media. 

But with dozens of social media WordPress plugins to choose from, finding the right one for you and your website can feel like a daunting task.

Whether you’re running a business website, small personal blog, or something in between, I’ve narrowed down and reviewed the best social media WordPress plugins on the market today.

The Top 6 Options For Social Media WordPress Plugins

How to Choose the Best Social Media WordPress Plugin For You

Certain features and functions must be evaluated as you’re shopping around and comparing social media WordPress plugins. This is the methodology that I used to narrow down the top picks listed above. You can use the same methodology and weigh things based on your personal needs. 

Site Performance

In general, performance is the biggest issue with social media plugins for WordPress. These plugins typically come with scripts and stylesheets that can ultimately slow down your website. 

That’s why it’s so important to look for a social media plugin that’s lightweight. Otherwise, load time and other crucial performance metrics will be impacted. Don’t just choose a feature-rich plugin if you don’t need all of its functionality. 

Active Social Profiles

What social media platforms are you currently using to promote your brand? How many of those profiles do you want to integrate with your website?

In terms of social sharing icons in a sidebar, less is typically better than more. Adding ten different social sites to this menu will just clutter your page and probably won’t drive much engagement. 

You should also consider the type of content and how it relates to specific social platforms. For example, it’s usually better to share blog posts on Facebook, Twitter, or LinkedIn. But images are better suited for Pinterest or Instagram. 

Content Goals

What is the main reason why you’re seeking a social media WordPress plugin? 

There’s a big difference between plugins designed to drive site traffic and plugins made for increasing your social media following. 

For example, social sharing plugins help encourage site visitors to share your content via social media. As a result, a wider audience can see your content and land on your website. Other plugins with a simple “Like Us on Facebook” button don’t have the same impact. These are designed to turn your website visitors into social media followers. 

Shortcodes and Custom Display Options

It’s important to have social media icons on your site that are visible yet non-intrusive. The best plugins help you customize how and where those icons are displayed. 

Do you want them at the top of your post? The bottom of the page? What about a floating sidebar? You might want to have share icons on all of your blog posts but not on your landing pages. Does the plugin allow you to customize these settings by post type?

Consider using a plugin that can match your site’s branding as well. This will allow you to change the shapes, sizing, and even colors of the widget. 

The Different Types of Social Media WordPress Plugins

Social media WordPress plugins come in all different shapes and sizes. Before we dive into the reviews of my top picks, it’s important for you to understand the different types of solutions in this category. 

Social Sharing Plugins

These plugins make it easy for website visitors to share your content with their friends and followers on social media. 

For example, let’s say someone reads one of your blog posts and wants to share that post on their Facebook timeline. Rather than making that person to copy and paste the link, a simple social sharing button directly on the page makes this process much easier. With a single click, website visitors can share your content via Facebook, Twitter, Pinterest, LinkedIn, and other social sites.

Some social sharing plugins have features to automate the scheduling and posting of your content via social media. Any time you publish a new blog post, that content will automatically get shared on your social profiles without any extra manual steps from your end. 

Social Feed Plugins

With a social feed plugin, your social media content can be displayed directly on your website. 

Let’s say you upload a new photo to Instagram. Rather than having to manually upload that same photo somewhere on your website, a WordPress plugin can just display it in your social feed. So the bottom of your home page or another landing page could include all of your latest social media posts. 

These plugins are perfect for turning website visitors into social media followers. Then you’ll have the opportunity to engage with those people even when they’re not visiting your website.

Login and Comment Plugins

Asking website visitors to create an account on your website is a great way to personalize content and grow your subscriber list. But not everyone wants to register completely new login credentials with every new site that they visit. 

There are WordPress plugins that allow website visitors to create an account and register by logging in via social media. So, someone could use their Facebook credentials to create an account on your website. There are no lengthy form fields to complete or new passwords to remember. 

Many of these plugins also contain features for social comments. By default, the comments system built into WordPress doesn’t have a social aspect. But you can use plugins so users can comment on your posts from their social media profiles. This helps drive engagement and more conversations on blogs.

Content Locking Plugins

Content locking plugins are one of the best ways to get new followers with a social media WordPress plugin. Here’s how it works. 

You can restrict access to specific content on your site until a visitor completes a certain action. For example, you could lock a blog post that will only be available once a visitor follows one of your social media pages. 

Not only will this grow your following, but it promotes engagement. Only highly engaged users will complete these steps. So, any new followers gained from this strategy must be actively interested in your brand. Just be aware that these plugins could potentially hurt the engagement on your website. If people don’t want to follow you on social media, that locked content will go unread. Try experimenting with just a few posts before you start locking all of the content on your website. 

#1 – Social Snap Review — The Most Versatile Social Media WordPress Plugin

Social Snap is arguably the most flexible social media WordPress plugin on the market today. Unlike other plugins that just focus on a single functionality, Social Snap does it all. 

With 230,000+ downloads, its popularity speaks for itself. 

The plugin integrates with 30+ social networks and apps, including Facebook, Twitter, Pinterest, LinkedIn, WhatsApp, Telegram, Google+, and more. Social share icons are fully customizable and can be placed anywhere on your pages.

Other noteworthy features and highlights of Social Snap include:

  • Automatically display social follower counts
  • Automatically publish new posts on social media
  • Bring old posts back to life with auto publishing for existing content
  • Social login for visitors on your site
  • Click to Tweet button
  • Social meta tags

Social Snap even supports advanced analytics. So you can fully grasp how your audience engages with your website content. 

Pricing starts at just $27.30 per year for a single website. Try it risk-free with a 30-day money-back guarantee. 

#2 – Easy Social Share Buttons Review — The Best For Simple Social Sharing

As the name implies, the Easy Social Share Buttons plugin is designed to encourage social media shares from your website. 

The plugin has 600,000+ installs and powers more than one billion social actions. 

Easy Social Share Buttons is trusted by sites like Kinsta, Asana, Trello, AdEspresso, and more. Its fast setup and simplicity make the plugin a popular choice for WordPress beginners and experts alike. 

Here are some of the top reasons why I recommend this plugin:

  • Works with 50+ social share networks
  • Template builder tool with 50+ templates
  • Click to Tweet button
  • Ability to pin any image on Pinterest
  • 12 different share positions
  • 14 share button displays

The plugin even supports advanced features, like conversion tracking, engagement tracking, custom display methods, and more. 

Easy Social Share Buttons has a lifetime license, and pricing starts at $22 for a single website. All purchases are backed by a 30-day money-back guarantee. 

#3 – Revive Old Posts Review — The Best For Social Media Scheduling and Automatic Posting

Revive Old Posts from Revive Social is another WordPress plugin with a self-explanatory name.

This plugin is trusted by 82,000+ WordPress users, and it’s one of my favorite ways to bring your old content back to life.

Getting started is easy. Once installed, you just need to give the plugin permission to access your social profiles. This can be completed in a few simple clicks. Next, customize the types of posts you want shared on social media. You can control parameters like minimum and maximum post age to create the posting schedule.

Other noteworthy highlights of Revive Old Posts include:

  • Ability to share new posts when published
  • Share posts multiple times with a content rotation
  • Ability to share blogs, pages, posts, images, products, and more
  • Automatically add hashtags to posts based on category, tags, or custom fields
  • Integration with Google Analytics Campaign Tracking

The plugin even lets you create different variations of your social posts for more variety. This helps you figure out which types of captions convert better than others. 

Pricing starts at $75 per year for a single website. Lifetime access starts at $225.

#4 – Smash Balloon Review — The Best WordPress Plugin For Displaying Social Media Feeds

If you want your social media content displayed on your website, look no further than Smash Balloon

More than 1.3 million people use Smash Balloon to share social feeds from Facebook, Instagram, YouTube, and Twitter.

It’s worth noting that each social media platform has a separate plugin. So, if you want to display your Twitter feed on one page and your Instagram feed on another, you’ll need to install each plugin separately.

With that said, Smash Balloon recently released a new plugin called Social Wall. This plugin combines the posts on all of your social profiles into a single feed. 

Here are some other reasons why I recommend Smash Balloon:

  • No-code simple setup
  • Customizable feed design
  • Intelligent caching and backup system to maximize the speed and performance
  • SEO friendly design
  • Display multiple feeds
  • Display likes, shares, and comments

Pricing starts at $49 per year. 

#5 – Social Locker Review — The Best For Getting New Social Media Followers and Driving Engagement

Social Locker is a bit unique compared to some of the other plugins on my list. It’s designed for a specific use case, which isn’t for everyone.

The plugin allows you to “lock” certain content on your website. That content will be unlocked when a site visitor completes an action, such as following your brand on social media.

Once the visitor takes the desired action, the locked content can be viewed or downloaded. The idea behind this plugin is to build quality followers on social media. Anyone willing to take this added step to view your content is likely very interested in your brand. 

There are four types of content locks that you can implement with this plugin:

  • Lock downloads
  • Lock promo codes
  • Restricted access for subscribers
  • Sign in to continue reading

It’s a popular solution for bloggers and other content-heavy websites. Download Social Locker and try it free for seven days; no credit card required. 

#6 – WordPress Social Login Review — The Best For User Registration

WordPress Social Login is the easiest way for website visitors to register accounts on your website. 

Instead of forcing them to fill out a new registration form, create a unique user ID, and remember a new password, this plugin allows them to register using their existing social media credentials.

With 60,000+ active installations, this is one of the most popular social media login plugins for WordPress on the market today.

Supported social platforms include:

  • Facebook
  • Twitter
  • Instagram
  • LinkedIn
  • Reddit
  • Tumblr
  • Twitch
  • Foursquare
  • Yahoo
  • Windows Live
  • AOL

The list goes on and on. I like this plugin because it’s simple but still fully customizable. You’ll have complete control over the authentication widget. Developers and designers will enjoy the plugin’s advanced customization capabilities as well.

Best of all? WordPress Social Login is open-source and 100% free to download.

Summary

Websites and social media go hand-in-hand. Using one to promote the other is the smart way to drive traffic and engagement. 

The easiest way to encourage social shares and promote your website content via social media is with a WordPress plugin. 

To recap:

With so many social media WordPress plugins on the market today, it can be difficult to find the right ones for your website. Stick to the recommendations reviewed above. From simple social sharing to content locking and social logins, I made sure to include something for everyone on my list.

The post Best Social Media WordPress Plugins appeared first on Neil Patel.

What is Passage Indexing & What Does it Mean for SEO?

What is Passage Indexing & What Does it Mean for SEO?

There are few things Google likes more than updating its ranking signals. If you’ve heard about passage indexing, there’s a good chance you have questions. 

What is passage indexing? Is it a significant update that will tank your website traffic? Or is it just another small change in Google’s ever-evolving algorithm and ranking factors?

Take a deep breath and ignore the doom and gloom. 

There’s good news: Passage indexing is not a huge Google update. It’s a small tweak to help the search engine understand content better and deliver the best results to searchers. 

There is no reason to stress about this update, go crazy trying to update your content, or spend thousands of dollars to get someone else to update it for you. 

(If you noticed a considerable drop in traffic recently, I recommend using this guide to diagnose traffic drops using Google Analytics, but most likely, passage indexing was not the cause.) 

However, this is not to say that this change doesn’t matter at all. There are SEO implications, which I’ll explain, and I’ll also share a few tips to help you make the most of passage indexing. 

What is Passage Indexing?

Google passage indexing is an automated feature that pulls sections from pages into search engine results, even if the page covers a slightly different topic from the main one. 

What does that actually mean?

Let’s look at an example: Say you wrote a long-form post about affiliate marketing. Your goal was to cover the topic in its entirety, so you included sections on how to be a successful affiliate marketer, what affiliate marketing tools to use, what affiliate marketing networks are most popular, and how to get started in affiliate marketing. 

That is a ton of useful content, but it also means your entire post probably won’t rank well for terms like “affiliate marketing networks” because only one section covers that topic. 

With passage indexing, Google can pull out sections of your content and rank it independently of the rest of the page. For example, your section on “affiliate marketing tools” might rank for that keyword, even if the entire post isn’t optimized for it.

See? Not such a big deal. 

Here’s an example of how passage indexing impacts search results: 

Passage Indexing vs. Featured Snippets

Notice how Google bolds certain words it deems relevant to the search. It’s looking for keywords that show the content is likely to be useful for a specific query. 

Google’s Martin Splitt said he would call the changes “Passage Ranking” because it’s actually a ranking change rather than an indexing change, so you might see those terms used interchangeably. 

Passage Indexing vs. Featured Snippets: What’s the Difference?

Featured snippets offer users an instant answer to short questions, which means users don’t have to click to get the answer to their question.

For example, if you search “what time is it in Paris,” Google provides the answer at the top of the search engine results without requiring you to click on a result. 

Passage Indexing vs. Featured Snippets

Passage indexing is an entirely different system that looks at the content of a page, determines if parts of the page answer a search query, and delivers those results in the SERPs.

How Does Passage Indexing Work?

As with most things from Google, the search engine hasn’t been transparent about how, exactly, the feature works. It keeps things interesting, doesn’t it? 

Here’s what we do know.

According to its blog, Google uses BERT and neural nets to understand content and rank passages better when appropriate. Google still indexes the entire page but looks for content and the meaning of passages while it crawls the full page. Each passage is annotated and can be ranked and scored independently. 

Google also says the shift impacts only seven percent of search queries, so don’t expect huge changes. If your page already ranks well, passage indexing (or passage ranking, if you prefer) may not impact your site at all.

However, sites with useful long-form content that isn’t perfectly optimized may see a small boost in rankings and, therefore, traffic. 

It seems passage indexing is the next step in using AI programs like RankBrain to better understand the context of content rather than looking at formulaic factors like keyword density.

Keep in mind passage indexing doesn’t impact what pages Google indexes, but rather, the ranking for specific passages.

What Is the Difference Between Passage Indexing and RankBrain? 

RankBrain is a machine learning-based algorithm that helps Google process search results and provides users with the most relevant search results. Passage indexing is not an algorithm; it’s an automated system that annotates long passages of content.

How Does Passage Indexing Affect SEO?

How much do you need to be worried about passage indexing when it comes to SEO? For most websites, it will have little to no impact on your SEO. Sites that do notice a change will likely see a small uptick in traffic. 

However, there are some minor changes worth paying attention to. 

Long-form content will have a better shot at ranking for more keywords. That could mean sites with shorter content take a small hit in ranking as longer-form content gets a boost. 

It is also more important than ever for sites to ensure on-page SEO strategies are in place, like using the right heading and optimizing anchor text. Pages with less optimization but better content could outrank you. 

If you’ve been avoiding long-form content, now might be the time to give it a go. Google shows that it’s willing to help users find useful content even if the page’s SEO isn’t perfect. 

However, sites with shorter content, such as e-commerce sites, are unlikely to see any change in their Google ranking. 

What Types of Sites Will Passage Indexing Impact? 

The change will primarily help sites with long-form content that’s not optimized perfectly. Publishers with a well-established SEO strategy, ecommerce sites with shorter content, and sites without long-form content likely won’t see any changes. 

What Are the Benefits of Passage Indexing? 

Now that we’ve covered what passage indexing is, how it works, and what impact it could have on our SEO, let’s talk about why you should care. Are there benefits to this change, or is it just another small shift you can ignore? 

There are a few benefits of passage indexing: 

  1. Longer form content gets a boost: This shift will help long-form content rank higher for more specific keywords. 
  2. Focus on users rather than Google bots: Google is once again showing us it wants site owners to focus more on creating content that users find useful rather than what the search bots want. 
  3. Long-tail keywords are more important than ever: Long-tail keywords and related terms are likely to help trigger passage indexing, so make sure to include phrases and longer terms, just like you would for voice search
  4. Could (slightly) reduce the importance of on-page SEO factors: In SEJ’s webinar, Google’s Martin Splitt stressed that this change is meant to help pages with great content that might not be optimized perfectly. Those pages won’t be penalized if they have great content, but don’t ignore on-page entirely. Sites in highly competitive niches will stand out by having great content and on-page optimization. 

It’s also worth noting that this change won’t increase Google penalties or result in a huge drop in traffic for most sites.

This is a slight change intended to help users find sites with useful content that might not be completely optimized.

How Can You Optimize for Passage Indexing?

In an interview, Google’s Martin Splitt was quick to say site owners shouldn’t fall for tools or agencies that claim they can optimize for passage indexing, as it is a small change aimed at helping boost sites with long-form content. 

While I don’t recommend revamping your entire website, there are a few small tweaks you can make, especially for long-form content:

  • Update long-form posts with new stats, links, and resources. 
  • Use clear, keyword-rich (but not overly optimized) headings for each section to help Google understand all the topics a post covers. 
  • If you don’t have long-form content, now is the time. Make sure to cover as much of the topic as possible, answer common questions, and use long-tail keywords. 
  • If you have a page containing a slightly different section related to the main topic, make sure the section is clearly written and optimized for the search terms users would use to find that information. 
  • Spend some time doing long-tail keyword research and integrate those terms in your long-form content.

Overall, don’t go crazy trying to optimize for passage indexing. You could swing too far the other way and end up over-optimizing your site, which can impact your rankings.

Is There a Tool to Help Sites Optimize for Passage Ranking? 

No, according to Martin Splitt, there will be no tool to see if your site is eligible for this change. Your best bet is to follow the suggestions above and focus on creating content that provides what users want. 

How Does Passage Indexing Affect the Future of Search Marketing?

Passage indexing is a small change in Google’s ranking system; however, it’s worth paying attention to.

Google has long said it puts users first, and this is one more push in that direction. SEO matters, but users should remain your core focus. 

It also shows that Google is dedicated to using AI to understand the context of a page. RankBrain, DeepMind, machine learning, and natural language processing help Google get a deeper understanding of context. This is an extension of those efforts. 

For digital marketers, this is good news! Google aims to keep its search results as relevant as possible for users. However, optimization is no longer enough to carry mediocre content. 

Conclusion

I hope by now you have a solid understanding of what passage indexing is, why it matters for your site, and how it could help increase your Google rankings

Keep in mind that most website owners won’t need to make any changes and won’t be penalized by Google. Sites with long-form content may see a small boost in rankings and traffic. 

This ranking change also provides some insight into where Google might go in the future. The search engine remains focused on providing users with the best possible user experience, which means marketers should focus their energies on users as well. 

If you need help with SEO and providing a better user experience, let my team help you.

Are you planning to update your digital marketing strategy in response to passage indexing? What changes will you make?

The post What is Passage Indexing & What Does it Mean for SEO? appeared first on Neil Patel.