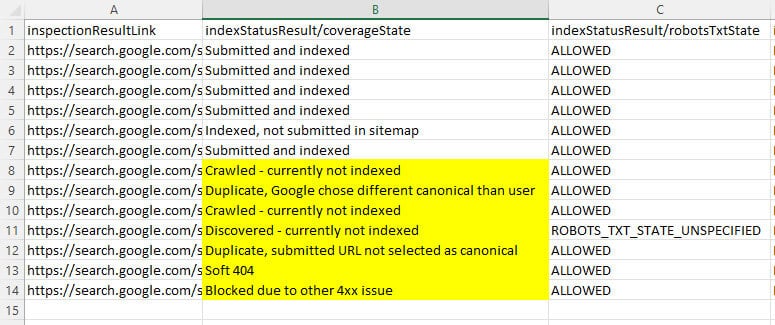
On January 31, Google released the URL Inspection API, enabling you to programmatically check the status of URLs in bulk (based on properties you have access to in GSC). Although you could always inspect one URL at a time in GSC to see if a URL was indexed, this is the first time you can check the indexing status of URLs in bulk (based on data directly from Google).
The API opens up many opportunities to understand how Google handles your URLs. Also, it has been great to see the various SEO tool providers move quickly to add the URL Inspection API to their products.
Monitoring indexing status via the URL Inspection API and Analytics Edge
Regularly checking the indexing status of important URLs can help nip SEO problems in the bud. For example, using the API, you can check on a daily or weekly basis whether your most important URLs are still indexed. And you definitely want to know if important URLs drop out of the index, whether it’s a result of technical problems, quality problems, or Google’s finicky indexing system. That’s versus identifying that problem down the line after you’ve experienced lost rankings and traffic as URLs drop out of the index. And that’s if you pick up the drops quickly enough.
As soon as the API was released, I started thinking about a solution to periodically bulk-check important URLs. In addition, I started thinking about checking URLs across different sites. And going even further, I wanted to move beyond the 2,000 requests per day limitation (per property), which can be severely limiting for many larger-scale sites. In this article, I’ll cover the solution I’ve been using. It’s easy to set up and extremely cost-effective.
Analytics Edge, your SEO Swiss Army Knife
I’ve written heavily about using Analytics Edge for a number of scenarios in the past. It’s an Excel add-in that enables you to work with several APIs directly in your spreadsheets (and provides a ton of functionality for working with that data once exported). For example, it’s a great way to export your top queries and landing pages from GSC, create Delta Reports after major algorithm updates, and more. And now, you can use Analytics Edge to bulk check URLs via the URL Inspection API.
But it can do more than that.
By creating several macros, which can be grouped, you can link API tasks together to create a powerful recipe for checking the status of many URLs across websites (or GSC properties from the same site). I’ll cover more about moving beyond the 2,000 URL limit per day soon.
What you can accomplish via the URL Inspection API using Analytics Edge
In this post, you’ll learn how to check the indexing status of your most important URLs, across different websites, all at one time. Instead of just checking one GSC property in bulk, we’re going to do that across several websites automatically (without having to trigger each macro on its own).
The goal is for you to open a spreadsheet, click the “Refresh all” button, and have Analytics Edge check all your top URLs across multiple sites. It can save you a ton of time, while also providing critical intelligence about important URLs that are no longer indexed.
Overcoming the 2,000 requests per day limit
You can only process 2,000 requests per day via the URL Inspection API (per GSC property). But there’s an important distinction between “website” and “GSC property.” Remember, you can set up multiple GSC properties per website by adding directories and subdomains, which can give you more data (because the reporting will focus on just those directories or subdomains).
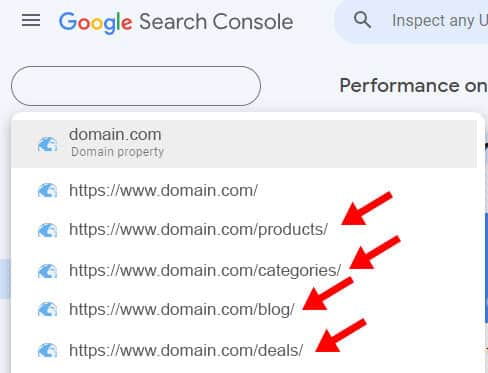
For our situation today, having directories or subdomains set up as properties will enable you to process 2,000 requests per day for each of those properties. That means you can check many more URLs per site if you have those additional properties set up. And using Analytics Edge, you can check the indexing status of URLs across those properties in one shot (using the process in this tutorial).
If you don’t need to check multiple websites, but want more requests for the one site you manage, then this can still help you get more data. So set up your top directories and/or subdomains. It’s easy, and more data awaits.
Tutorial: How to set up a multi-site indexing monitoring system using the URL Inspection API and Analytics Edge
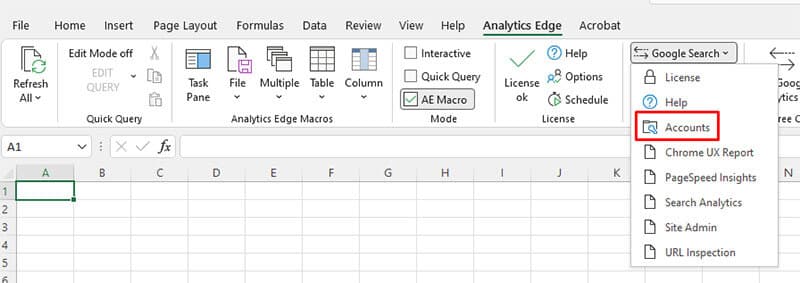
Step 1. Download and install the Analytics Edge core add-in. I have covered how to set up Analytics Edge several times in previous posts, and you can check those posts to learn how to do it. You should be up and running in no time. Once you install the core add-in, you can quickly add the Google Search Console connector. You will need both to accomplish what I am covering in this post. License-wise, there are free trials for both the core add-in and the GSC connector. After which, it’s $99 per year for the core add-in and $50 per year for the GSC connector.
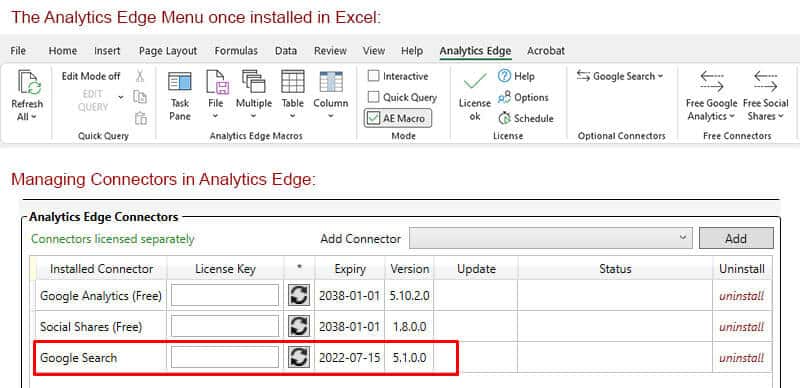
Step 2. Now it’s time to connect to your Google account that has access to the GSC properties you want to monitor. In Excel, click Analytics Edge in the top menu. Next, click Google Search. Then Accounts in the dropdown menu. Go through the process of connecting your Google account and authorizing access. This should only take a few seconds.
Step 3. Create a worksheet that contains the top URLs from the first website you want to monitor. You can include up to 2,000 URLs per worksheet. For this tutorial, I would only add the top 10 or 20 URLs for the site (so you don’t have to wait too long for the API to process your requests while building the system). After which, you can add up to 2,000 URLs per worksheet. Make sure the column has a header. I would use “page” as the header in this example so you can follow along. You can name the worksheet whatever you want, but I used “site1” for this tutorial. You could name each worksheet based on the site name.
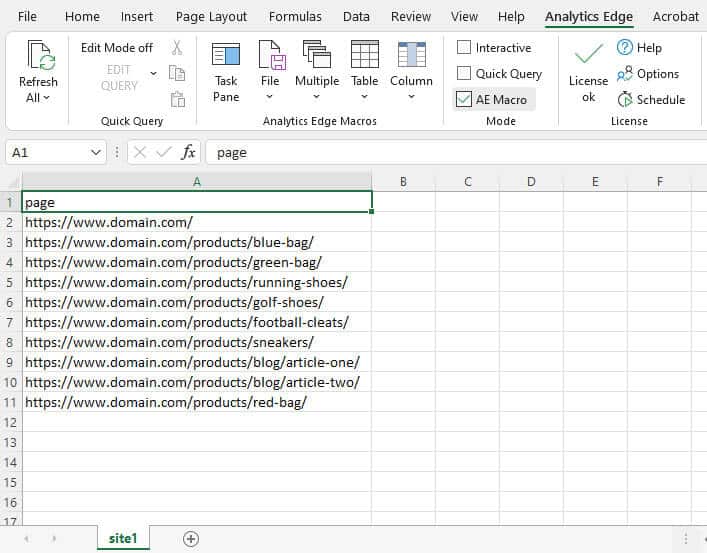
Step 4. Next, we’ll create our first macro to check the URLs via the URL Inspection API. We’ll get to the second site after that (and then you’ll be able to run all the macros at one time). But for now, let’s focus on using the URL Inspection API to check indexing for the first list of URLs. Analytics Edge provides a ton of functionality you can use when crafting macros. You can explore the various menus to see everything you can accomplish.
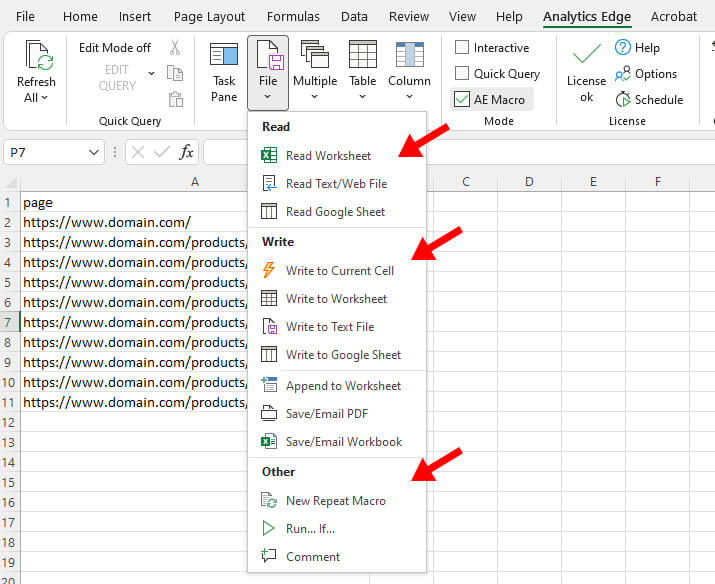
Step 5. When you create a macro in Analytics Edge, you combine a series of instructions that will run together (like a recipe). For our purposes, we want to first read in the list of URLs from our worksheet, then use the URL Inspection API to check those URLs, and then write the results to a new worksheet (so you can analyze the data).
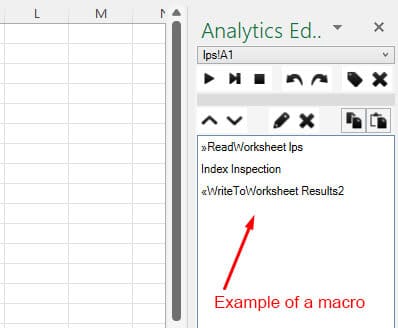
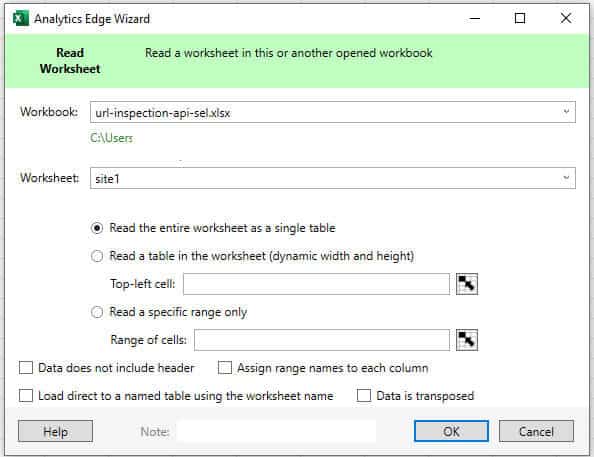
Step 6. In the Analytics Edge menu, click the File menu, and then Read Worksheet. This will pull the complete list of URLs you have in that worksheet. In the dialog box, the workbook will be the current workbook, and the worksheet should be the current worksheet. You shouldn’t have to change anything. Just click OK to read the worksheet. Also, notice how the Task Pane in Analytics Edge adds each part of our macro as we execute them. After each step, you will see the new instruction added to the macro.
Step 7. Analytics Edge creates a temporary worksheet named “Step Results” containing the list of the URLs you will process with the URL Inspection API. Next, let’s use the API. In the Analytics Edge menu, click Google Search, and then URL Inspection. In the dialog box, select the Account you set up earlier and then the GSC property you want to work with. Then you must tell Analytics Edge where the URLs are in the worksheet by adding the column name to the URL field. To add the column name, surround the name with brackets. So, if you used “page” as I did earlier, add [page] in the field. Then click OK.

Step 8. Next, let the URL Inspection API process all the requests (which shouldn’t take too long since we’re only testing a handful of URLs). Once that’s done, the Step Results worksheet will contain a sample of the results highlighted in green. Next, let’s write the results to a new worksheet where you can analyze and work with the data.
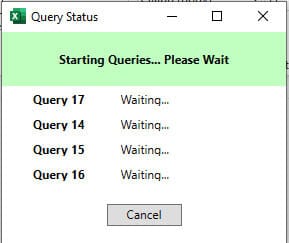
Step 9. Write to Worksheet – In the Analytics Edge menu, click the File menu and then “Write to Worksheet.” Give your new worksheet a name like “site1 Results” and click OK. You now have a new worksheet containing the URL Inspection results for the list of URLs you want to monitor.

Step 10. We want to check multiple GSC properties in one fell swoop (across different websites). So, let’s create a second macro to do that (and then we’ll run them together via Analytics Edge).
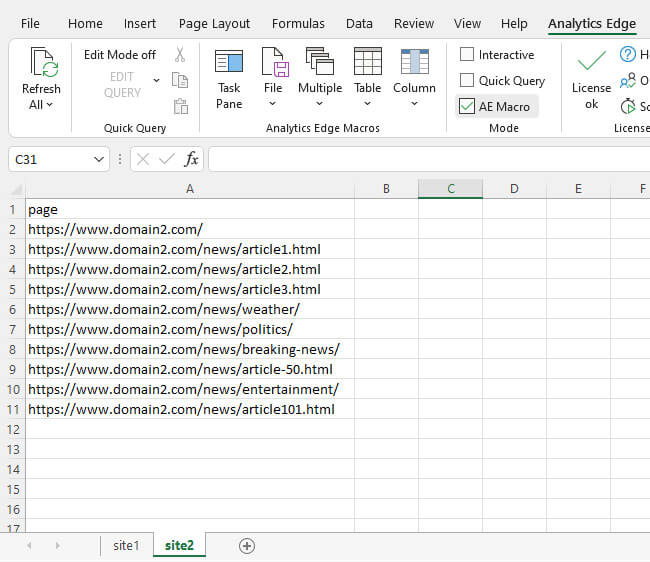
Step 11. Create a new worksheet with URLs from a second website (or second GSC property for the same site you ran earlier). You can name this worksheet “site2” for this tutorial. And again, you can name it by site if you want in the future. Add the top URLs from the second site you want to monitor. Again, I would add only 10 to 20 URLs. You can use “page” as the column name again.
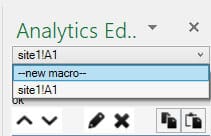
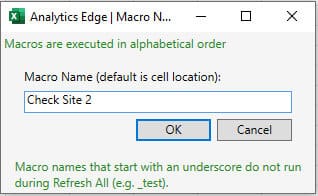
Step 12. Create a new macro that will work with this second list of URLs. The first macro is already set up and will work with the first worksheet of URLs. This second macro will use the new list of URLs. In the Task Pane for Analytics Edge, you will see your current macro. Click the dropdown and select “new macro.” Name is whatever you want. I called it “Check Site 2”. Also, if the Task Pane isn’t showing for some reason, you can reveal it by clicking the Analytics Edge menu and then Task Pane on the left side. It’s a large icon next to the File menu.
Step 13. Next, go through the same process we did earlier to create the instructions for reading the worksheet, using the URL Inspection API, and writing the results to a new worksheet named “site 2 Results”. You will have two macros that process URLs from two different worksheets when you’re done. And each macro writes the results to a fresh worksheet to analyze and work with the data.
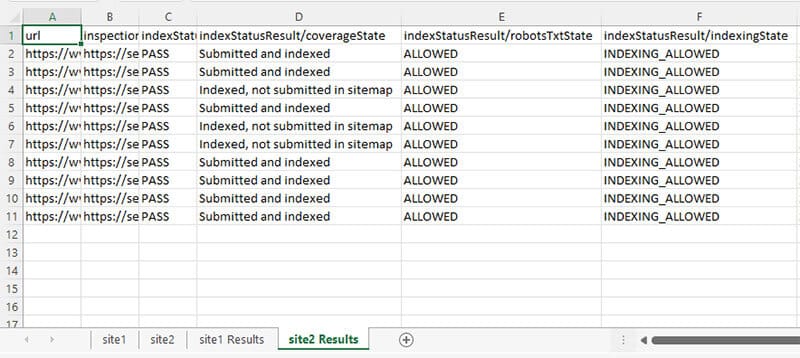
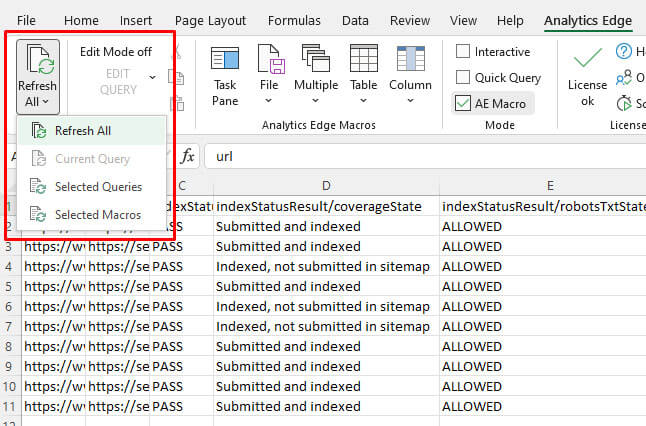
Step 14. How to monitor the URLs regularly – Now that you’ve created the two macros, you can always open the spreadsheet and run them at one time (to check the URLs you want to monitor across GSC properties). To do this, click the Analytics Edge menu and click the “Refresh All” button in the upper left corner. Analytics Edge will run both macros (in alphabetical order). Once the macros are complete, you’ll have fresh data to analyze. Save each spreadsheet with a new name so you can monitor your results over time.
Congratulations! You now have a multisite URL Inspection monitoring system.
You can add more sites to monitor by adding additional macros to the spreadsheet. And again, if you have a large site, then adding multiple directories or subdomains as properties in GSC will enable you to move beyond the 2,000 requests per day limit. So, you could add multiple GSC properties (from the same site) versus checking different sites.
Summary – Start with a simple URL Inspection monitoring system and expand from there
Ready to create your own system based on this tutorial? Then download Analytics Edge (the core add-in and the Google Search Console connector) and get a simple example working. Once you do, then expand your efforts by adding more GSC properties.
I think you’ll dig working with Analytics Edge, how versatile it can be, how fast it can work, etc. It’s a great way to monitor important URLs (across sites or properties). And feel free to ping me on Twitter if you have any questions while working through your first macros! Happy monitoring.
The post How to create a multi-site indexing monitoring system using the URL Inspection API and Analytics Edge appeared first on Search Engine Land.
No comments:
Post a Comment