Wednesday, May 26, 2021

How to Set Up a Bing Ads Campaign

With more than a billion unique monthly visitors, Bing is a hugely popular search engine. Sure, it’s nowhere near as popular as the world’s biggest search engine, Google, but it’s an impressive and powerful platform in its own right.  

In fact, if you’re running a paid ads campaign, it could be a mistake to ignore Bing and all the possibilities it can offer you. 

With that in mind, let me show you why it might be worth launching a Bing PPC ad campaign.      

Why Should You Run a Bing Ads Campaign?

Depending on what you’re selling and who you’re targeting, Bing could be the missing piece of the puzzle for your marketing strategy. Here’s why. 

First, Bing has a 6.7 percent market share, making it the world’s second-largest search engine. That might not sound like much, but there’s huge growth potential here. 

Next, over 1 billion people use Windows 10. Since Microsoft owns Bing, they direct a lot of traffic to their own search engine through Cortana and the search bar at the bottom of the computer screen. That’s some easy, reliable traffic right there! 

Finally, according to a Wordstream study, the average click-through rate (CTR) for Bing Ads is 1.25 percent, while it’s only 0.86 percent for Google Ads.

Seems like it’s worth paying attention, right?  

How to Set Up Your Bing Ads Campaign

Ready to get started? Great. It’s simple to set up your first campaign, so let me walk you through the steps. 

1. Create a Microsoft Advertising Account 

To start, you need a Microsoft Advertising account since Bing Ads is now a part of Microsoft advertising. It’s free to sign up, and you can use an existing email address to do so. 

First, head over to Microsoft Advertising, and click “Sign Up Now” to register.
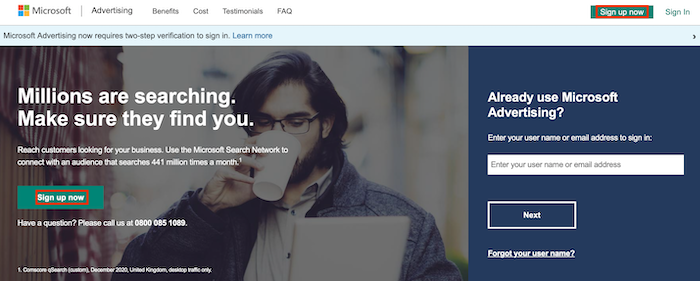
How to Set Up Your Bing Ads Campaign - Create a Microsoft Advertising Account

On the next page, click “Create One” to set up a new Microsoft Advertising account.
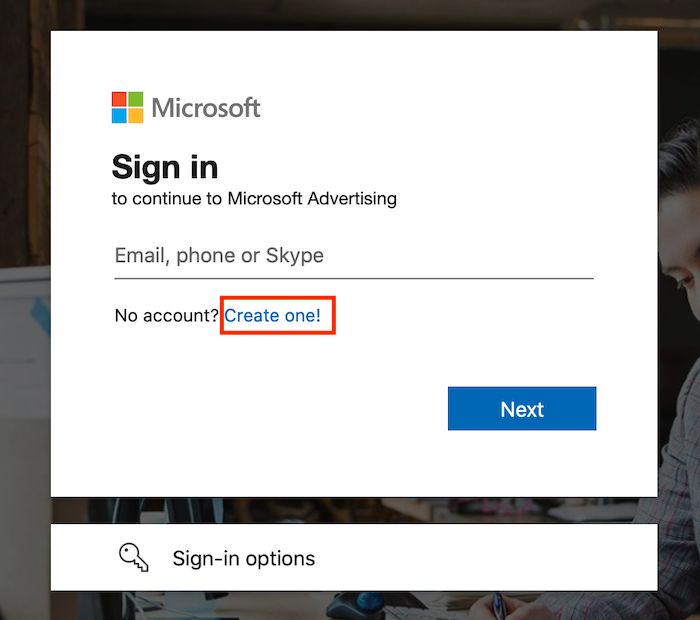
How to Set Up Your Bing Ads Campaign - Go to “Create One” to set up a new Microsoft Advertising account

You can either use an existing email address or create a new one to run your account. 

Next, simply follow the onscreen instructions. You’ll need to input some basic details like your name and your business location. Agree to the Terms of Service and create your account.

2. Import an Existing Google Ads Campaign (Optional)

Are you creating a Bing Ad from scratch? Move on to step 3. If you’ve already got a Google Ads campaign you want to run on Bing, this step is for you. 

First, go to your top menu, select “Import,” then select “Import from Google Ads.” Then, just sign in to Google. Go to “Choose Accounts,” select the account you want to import an ad from, and hit “Next.”

If you’re happy to import your Google Ad with no changes, name the imported campaign and click “Start Import” or hit “Customize Report” to tweak things like your bids and bid strategies.

Want to import multiple Google Ads simultaneously? You can import up to 10 at one time, and the steps are pretty much the same. 

Once you’ve imported your desired campaigns, double-check all the details to ensure they’ve moved over correctly, paying particular attention to your targeting settings, bids, and budgets. 

Make any adjustments as necessary, and you’re good to go.   

3. Choose the Right Keywords

Before you create your campaign, you need to choose your target keywords. Unless you choose the “right” keywords for your campaign, your ad won’t reach the right people. 

How do you find the perfect keywords? Well, you need to run some keyword research. Microsoft advertising has a built-in keyword planner to help you do just that. 

First, sign in to your account. Select “Tools” from the top menu and scroll down to “Keyword Planner.” You can then enter details like your business name, location, and service, and the keyword planner will show you suggested keywords to bid on.
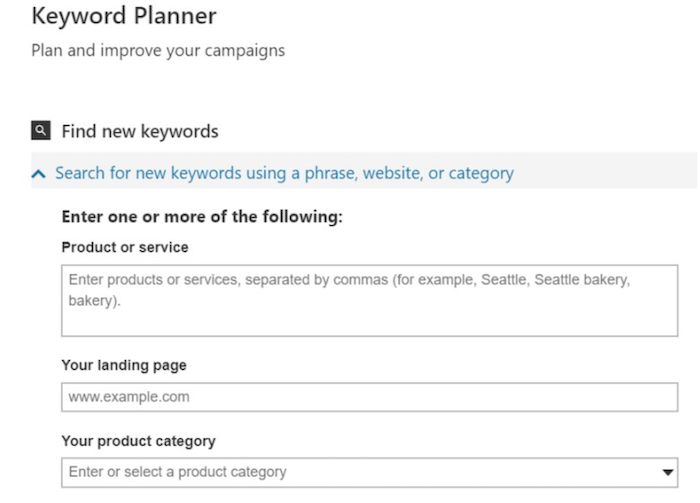
How to Set Up Your Bing Ads Campaign - Choose the Right Keywords

To improve the search results, input any keywords you know you want to use and note down any negative keywords you want to exclude from the results.
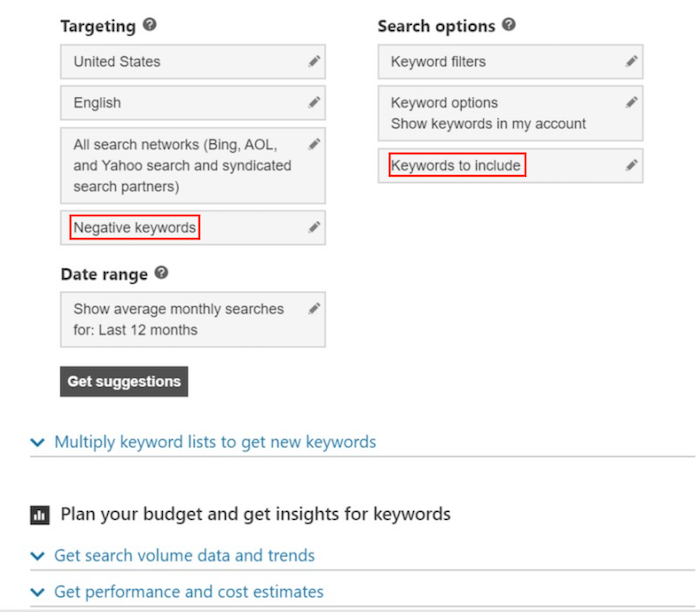
How to Set Up Your Bing Ads Campaign - Use Keyword Planner

You can also check for search volumes, trends, and cost estimates to help focus your keyword research.

How do you know which keywords to go with? Stick with keywords connected to “commercial intent.” These are the keywords people generally use when they’re ready to buy a product or sign up with a service, so it makes sense to target them in your Bing Ads campaign.

Say you sell wine. A phrase you might use is “buy wine” because, unsurprisingly, most people using this search term want to actually buy wine. When you search for this keyword and related suggestions, this list appears:
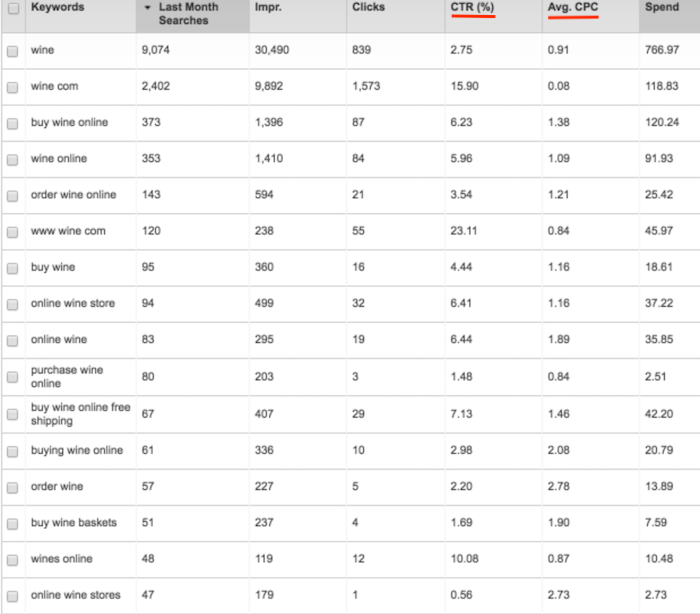
How to Set Up Your Bing Ads Campaign - Use Keyword Planner, Sell Wine Example

While all the columns matter, pay close attention to the CTR and cost-per-click (CPC) columns. The higher the CTR, the more people click through the ad. Balance this against how much the average click actually costs you to determine which keywords might be best for your campaign and your ad budget.

There’s no need to limit yourself to Microsoft’s keyword planning tool. You can also check out Ubersuggest for other keyword ideas and use your findings to inform your ad. 

4. Create Your Bing Ads Campaign

Once you’ve set up your account and completed your keyword research, it’s time to create your first Bing Ad. If you didn’t import any campaigns in step two, or if you’re creating a new Bing Ads campaign, this step is for you.

First, go to your “Campaigns” page and then click the “Create Campaign” button in the middle of your screen.
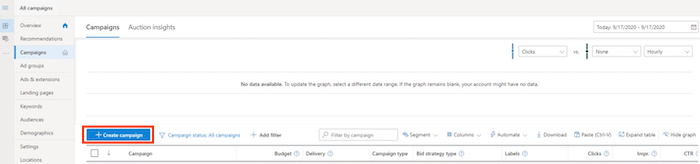
How to Set Up Your Bing Ads Campaign - Create Your Bing Ads Campaign

Then, set your goal. Your goal could be, for example, conversions to your website, a dynamic search ad, or selling products from your catalog. The setup wizard walks you through the different options available. 

Next, simply follow the onscreen instructions to complete your Bing Ads campaign. Once you hit “Save,” your ad will go live. 

Before you finish setting up your Bing Ad, you can go ahead and set customized parameters to maximize your chances of reaching the right audience. For example, you could choose which times you want to show your ad or which age groups you want to see your ad.
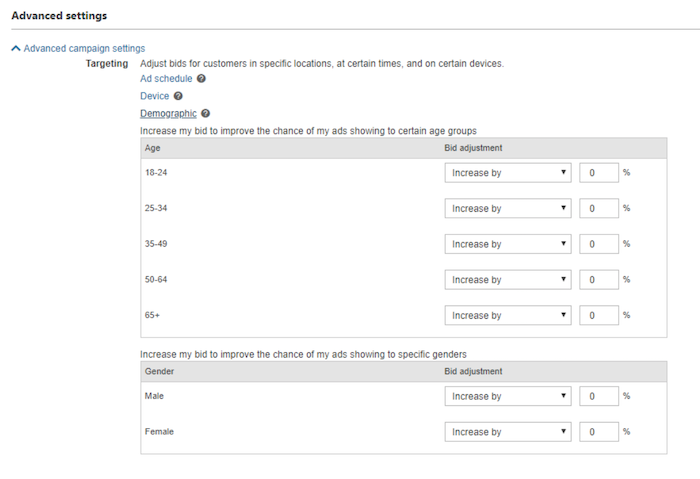
Bing Ads - Set Custom Demographics for Targeted Ads

Setting up custom parameters ensures you’re getting the most from your Bing Ads. 

5. Track Your Results

It’s all well and good setting up a Bing Ads campaign, but you also need to ensure it’s bringing you the desired results! To assess the effectiveness of your campaign, you need to track two metrics: conversion rate and CPC.

Checking your conversion rate tells you how many people are taking the desired action through your ads, and assessing your CPC shows if you’re overspending on your ad budget. 

How do you track these metrics? Well, let’s start with conversion rates. You can easily track conversions by simply clicking on the “Campaigns” tab and checking out the number in the “Conv.” column.
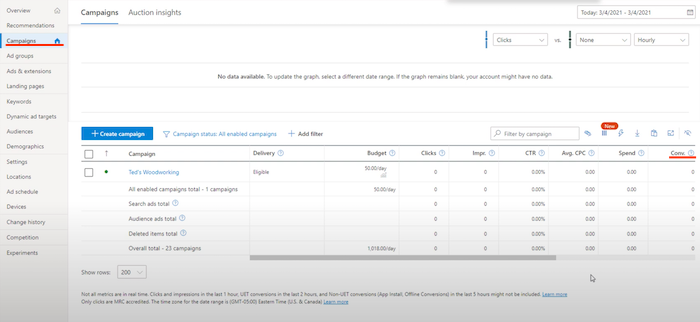
How to Set Up Your Bing Ads Campaign - Track Your Results

From here, you can tell how many conversions you’re getting per campaign. You’ll notice you can track everything from impressions to your CTR from this tab, so you can quickly track whichever metrics you deem the most important, all from one page.

Similarly, then, you can view your CPC from the “Campaigns” tab. Check how much you’re spending per single click and confirm it’s in line with your expectations and marketing budget. 

If you’re spending too much, consider bidding on different keywords or amending your campaign somehow.  

5 Tips for Creating a Successful Bing Ads Campaign

A successful Bing Ads campaign is about more than just keyword research and metrics tracking. To get the most from your campaign and maximize your ROI, follow these tips.

1. Know Your Audience

Whether these ads work for you really depends on what you’re selling and who you’re selling it to. For example, slightly older and wealthier audiences may prefer Bing to Google, so if you’re selling, say, wine boxes aimed at middle-class Americans aged 45+, Bing could be perfect for you. 

The best way to know if Bing’s worth your time? Build a customer profile. Identify who you’re targeting and what they respond to best. 

Do you already use a tool like Google Analytics? Check your demographics data. If you trend towards a younger audience, you might not get the results you’re looking for from Bing Ads. 

2. Import High-Performing Google Ads

If you’re already running high-performing Google Ads campaigns, it makes sense to import them into Bing Ads. While you can, of course, simply set up entirely new campaigns, you’ll save time and effort by just importing your successful campaigns.

Not sure which Google Ads campaigns to import? Think about which ones are most likely to appeal to the demographic you’re targeting on Bing Ads and work from there. You can always remove these campaigns and import others later. 

One final point here: Just remember to double-check that everything moved over seamlessly from Google Ads to Bing before you go live. 

3. Improve Your Targeting

To get the most from your Bing Ads, you must ensure they’re reaching the right audience. How do you measure this? By pulling multiple analytics reports. 

For example, you could track segments including:

  • audience
  • time of day
  • device
  • geography

Say you discover you get the most conversions from mobile devices on weekends before 5 p.m. Focus on ensuring your ads appear most frequently at this time to maximize your conversions. You’ll get the most ROI from your budget this way! 

You’ll find all the tracking tools you need on the “Campaigns” page. 

4. Use the UET Tag

To track your conversions accurately, you need to set up the “Universal Event Tracking” (UET) tag. Why? This tag allows you to see exactly what users do after they click on your ad and visit your site. 

In other words, if you want to know whether someone bounces from your landing page immediately or actually commits to a purchase, you need a UET tag. 

It’s easy to set up. First, go to your “Campaigns” page, click “Conversion Tracking,” then “UET tags.” Give it a name to help you identify it. In the description box, enter your URL or website name. Save the tag you’ve just created.

Next, copy the code and paste it into the pages of your website you wish to track. WordPress plugins can help here.

Finally, add some conversion goals to your tag, whether it’s tracking how long someone spends on your website, purchases they make, and so on. 

The Microsoft support page has more guidance on how to run UET tags if you’re new to them.

5. Monitor Your Quality Score

Your quality score reveals how your Bing Ad stacks up against competitors’ ads. It’s based on three things: your CTR, ad relevance, and landing page experience. Here’s what the scores mean:
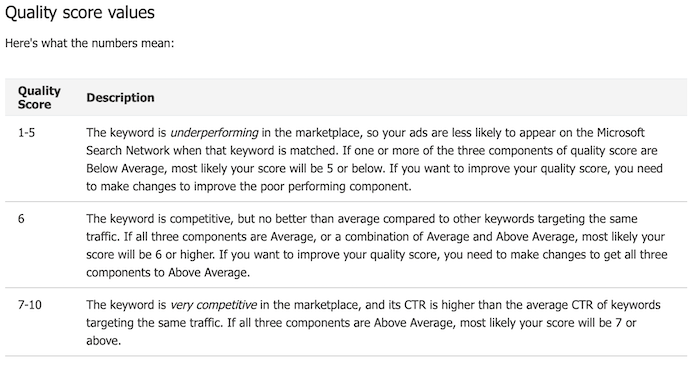
Tips for Creating a Successful Bing Ads Campaign - Monitor Your Quality Score

In short, a low-quality score means your ads won’t appear as often as they should, whereas a high-quality score means you’ve got a competitive keyword and CTR, so your ad appears more often. 

To view your score, click the “Keywords” tab on the “Campaigns” page and check out the “Qual. score” column. Check it frequently to confirm your ads are performing well.

Final Thoughts on Bing Ads

While Bing Ads aren’t for everyone, they’re definitely worth a closer look. For many businesses, they offer a cost-effective alternative to Google Ads, while others might find it’s best to run PPC campaigns across both platforms. 

The only way to know is to try them out for yourself! It’s simple to set up a campaign, so consider importing a high-performing Google Ads campaign and seeing how it goes.

Have you set up your first Bing Ads campaign yet? How are you finding it?

How to Block Bots From Coming to Your Website: Tools & Tips

Block Bots From Coming to Your Website: Tools, Tips, & and How to

If you have a website, you need to know what bots are and how they can find your site, as well as what they can do (either intentionally or indirectly) to cause frustration to your online marketing efforts. Blocking bots may be a necessity to protect your site’s speed, users, and security.

Let’s talk about what bots are and how you can put up some defenses to start protecting your website.

What Are Bots, and How Can They Be Bad?

Before we dive into the details of what they can do and how you can stop them, we need to take a step back and explore what a bot is.

A bot is a software script that performs a data task over and over again. It’s that repetition and data interaction that makes them a fellow member of the online world we interact with.

Some of the other names you hear bots associated with help explain what bots are and how they work. Think of terms like spiders, crawlers, or web bots.

Are They All Bad?

There are a couple of misconceptions we can set aside right away.

Even though the term is short for robots, bots are not robots in the form of metal, gears, and computers. They are bits of script, as we discussed, that run continuously over the data of websites or other online platforms.

Also, they are not necessarily maliciously driven by a hacker or person with ill intent. Sometimes they’re neutral or even useful, such as bots used by search engines to index websites.

How Do Bots Work?

As we mentioned above, bots are generally bits of software script that repeat a task over and over again. An outside person, either friend or foe, may deploy these to accomplish a specific task.

However, bots are getting “smarter,” so to speak, and some are created with artificial intelligence (AI) or machine learning technology. Some examples of these are chatbots for e-commerce that brands can use to learn from human interaction and deliver a better customer

service experience for their audience.

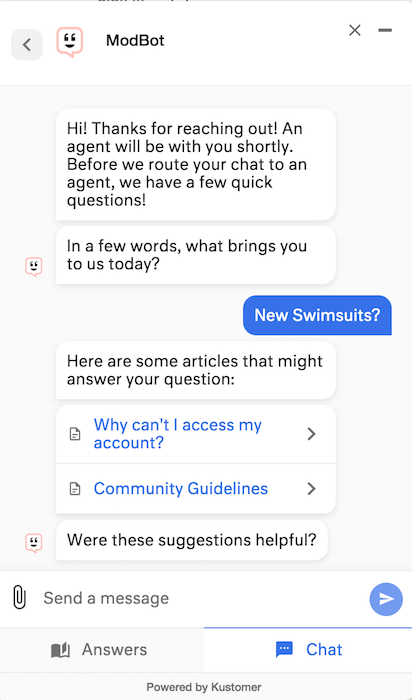
Here’s an example of an e-commerce chatbot on the ModCloth website:

block bots - modcloth chatbot example

What Do Bots Do?

As we’ve said, bots can be useful, such as indexing for a search engine or improving customer experiences.

They can also be malicious and cause trouble for your website or other web presence. Some bots are intended to crawl websites and steal data like passwords, identifiable information, or personal data. They can also deploy malicious attacks on websites, computers, and other places. Some get sophisticated, unfurling a series of steps to cause chaos for another user or organization.

They can also be used to surge interactions online. This may come in the form of flooding a page or forum with comments, driving up purchases or popularity of something to stir up interest, bumping up social media interaction to improve views, or other ways to “game the system.”

These are often the ways you may start to see bot activity on your website.

How Can You Tell If Your Website Has Bot Traffic?

Do you need to block bots on your website? Here are some signs and how to check.

Red Flags You May Need to Block Bots

There are some signs that bots have been to your website, and those may be the first place to start. Here are a few to look for:

  • excess commenting in your blog or other pages
  • comments that don’t seem readable or human-generated
  • comments with excessive linking or obvious spam
  • excessively or suddenly high bounce rates on a particular page
  • a sudden surge of sign-ups for your newsletter or other forms
  • email sign-ups that don’t seem human-generated
  • log-in attempts from unknown sources
  • any other activity that appears fishy

Where Can You Check to Block Bots?

If you have a gut reaction that you need a bot blocker, you can do a deeper dive to determine whether bots are a problem for your website and whether it’s worth investing time to block bots.

Here are a few places to explore:

  • Google Analytics to investigate traffic on your site
  • A service like Copyscape to check if your content was plagiarized somewhere else
  • your web server logs to learn more about where people are coming from

10 Steps to Block Bots From Coming to Your Website

Trying to block bots from coming to your website can feel a little like trying to put up an invisible shield around your site to ward off invaders.

While it’s not quite so fanciful, taking steps to keep bots from invading and causing chaos on your website is about being proactive and putting processes into place ahead of any problems.

It starts with understanding the enemy, removing any current problems, and then preparing for future attacks. Here are some steps you can take:

1. Identify the Weight of the Problem

If you’re reading this far, you probably have some concerns about bots and want to know more about how to block website bots. Before jumping in, though, it’s always good to consider what’s happening on your website.


Are you having a significant problem with bots, or are you just noticing some increased activity?

Further, consider what the impact has been or could be on your online marketing efforts. As we mentioned above, some bots are good, and some are bad. Some are just neutral.

For instance, you might have a bump in activity on your website on a given day or a given page for no apparent reason. You can’t link them to a specific marketing campaign that promoted that page and caused a spike. The surge in activity may have come from a bot.

If the surge was short-lived and you haven’t seen any other issues, it may be worth looking into but may not warrant extreme or rushed reactions.

On the other hand, if you’ve found your e-commerce site was hacked, or if parts of your website have been infected and are no longer functioning properly, you probably want to act quickly to batten up the hatches and clean up your website. If that’s the case, you may want to jump to the later steps here and start taking immediate action.

2. Understand the Source

Once you realize that web bots have been bothering your website, you’ll need to go on a bit of an investigation to find out where they’re coming from.

I listed above some places that can help you explore whether bots are attacking your website. They can also help you figure out the origin of those bots.

For example, in Google Analytics, your web server access logs, or any log-in attempt emails, you may be able to see data related to those visiting your site. You can check for a pattern or a series of the same IP address repeatedly.

3. Make a Plan

Now it’s time to decide what to do.

If you’ve already suffered an attack, you’ll need to take steps to clean up the problem and patch any vulnerabilities in your site to avoid further problems.

If you’ve been seeing bot activity but haven’t been attacked, you should focus your plan on looking for vulnerabilities that could be exploited in the future and tighten them up now.

4. Stay Up to Date

Keep your website and all its integrations up to date with the latest releases. Whichever website CRM provider you use, ensure you’re staying current with that platform’s releases. For instance, if you use WordPress, you need to ensure that your theme and plugins have the latest updates.

Staying up to date has its advantages. First, bots may use older versions to gain access. Further, platforms are motivated to provide secure products to their customers. The latest updates may come with increased security features and bot blocker options.

5. Add CAPTCHA Tools

One way to block bots from interacting with parts of your websites (such as sign-ups, contact pages, and purchase options) is to ensure that only humans can perform those actions.

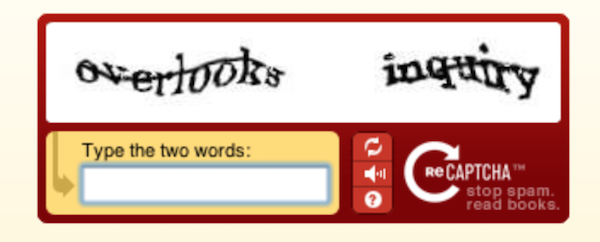
CAPTCHA forces the user to perform a challenge or other action to prove they’re not a bot. Unless a bot has the correct action written into their script, they won’t finish this task and move on.

Here is an example of a CAPTCHA you’ve probably seen before:

Block Bots From Coming to Your Website - Add CAPTCHA Tools

6. Check Your APIs and Other Connections

Especially if your website is a few years old, you may have installed many API integrations and other connections to other web platforms. If you’ve permitted that integration to connect with and share data with your website, APIs could be an area of vulnerability.

Conduct an audit of every API, plugin, connection, or other integration:

  • Do you use them all? Remove the obsolete ones.
  • Are you using the latest versions? If not, update them.
  • Are you using quality products? If they don’t have security measures in place, consider replacing them.

If you have questions, reach out to the platform owner and make sure they are secure.

7. Block Older Browser Versions

This is not foolproof, but another way to close up some ways bots can access your website is by blocking older versions of browsers from accessing your website. You might achieve this by requiring users to use new versions of browsers to view your website.

TechRepublic encourages using this method as most human users will be forced to update to a newer browser version.

This requires accessing and updating the .htaccess file of your website, so unless you are experienced with coding, we recommend engaging with a web developer for this.

8. Patch It

If you’re struggling to stay up to date with the bots coming to your website or feel like the problem may be bigger than you want to control, you can turn to a professional to start digging deeper into bots that may be heading to your website.

If you notice a specific bot that keeps arriving at your website and causing problems, such as offensive comments or attempts to gain unauthorized access, you can block that IP address from gaining access to your website in the future.

Many web hosts, such as GoDaddy, provide detailed information about how to accomplish this task. However, you should know that this is only a patch. It can stop a rather insidious attack in its tracks, but many hackers or malicious bot launchers have ways of coming in from other IP addresses, so the solution may not hold long-term.

Also, Hubspot reminds us that blocking an IP address means blocking all access from any person or bot from that IP address, so weigh the pros and cons before making a decision.

9. Keep Up With It

For a long-term solution, you may choose to pay for a bot blocker service. Although there are many different options, they all promise you a bit of peace of mind as their integrated solution stays on your website, comparing visitors with their information to watch for and alert you of any problems. A few options include:

  • DataDome
  • Cloudflare
  • Radware Bot Manager
  • ClickGUARD
  • Google ReCAPTCHA

10. Ongoing Monitoring

Bot blocking isn’t a one-and-done situation. You will need to continue to monitor your website for any problems.

You can watch for any of the problems discussed above and take steps to close up any holes. You may want to add this to your calendar to check in monthly or quarterly.

You can also keep an ear out for public data breaches. If you hear of any wide-scale attacks, take a look at your website and look for signs of any bot activity.

Conclusion

As AI in marketing continues to grow, our discussion of blocking bots, as well as adding them to our marketing stack, will likely increase as well. Bots can be helpful in our digital work and can support our digital marketing strategy.

They can also be malicious and attack your website at any time. The best way to block bots is to stay vigilant and keep your web presence up to date and cleaned up.

Don’t let vulnerabilities like outdated plugins or open access ports linger, inviting opportunistic bots. Monitor as you go and consider hiring an outside third party if the problem or the risks start getting bigger than you want to handle.

What’s the first step you’re going to take to block bots?

Tuesday, May 25, 2021

How to Check Subscriber Count on YouTube, Instagram, Twitter, & More

How to Check Subscriber Count

Whether you run a YouTube channel, blog, or social media empire, it pays to know how many subscribers you have on each platform. Not only do subscriber counts show you which channels are working and which aren’t, but you can also leverage them to build stronger and more profitable partnerships with brands.

Checking your subscriber count isn’t always easy, though. For every platform like YouTube that makes your following incredibly transparent, there’s a channel where it can be next to impossible to find your subscriber count.

Notice I said “next to impossible,” not “totally impossible.”

I’m here to explain how you can check your subscriber count on every major channel and social media platform.

Why Is It Important to Know How Many Subscribers You Have on Different Platforms?

It’s vital to know exactly how many subscribers you have on each platform for several reasons.

Let’s say you’re an up-and-coming marketing influencer. Part of your income will come from brands paying you for sponsorships and endorsements. Exactly how much they pay you hinges on how many subscribers and followers you have.

If you can show 50,000 people subscribe to your podcast, 100,000 people read your blog each month, and almost half a million people follow you on Instagram, you’ll be in a very strong position to command a big payday.

Your subscriber count can also help you make decisions on your way to becoming an influencer or growing your business’ following in general. Imagine you created accounts on Facebook, Twitter, LinkedIn, Instagram, and Pinterest when you started your business and posted to all of them equally.

At some point, you need to focus your efforts on the platform where you see the most success. Your subscriber count is a great way to quickly separate the good social media platforms from the ineffective ones. After all, what’s the point of wasting time on Pinterest, where you have half a dozen followers, over Twitter, where you have several thousand?

It’s not just social media subscribers you should think about, though. Perhaps you have a blog that gets upwards of 100,000 visitors every month, but you only have a couple of hundred people on your email list. This indicates your email marketing strategy isn’t working, and you should take steps to change that.

How to Check Your Subscriber Count on YouTube

YouTube is one of the more transparent subscription-based platforms out there. Log in to your account, click on your profile photo, and head to your channel. You’ll see your subscriber count underneath your channel’s username.

You can also see your subscriber count by navigating to YouTube Studio. In addition to the overall numbers, you can find a list of your 100 most recent subscribers.

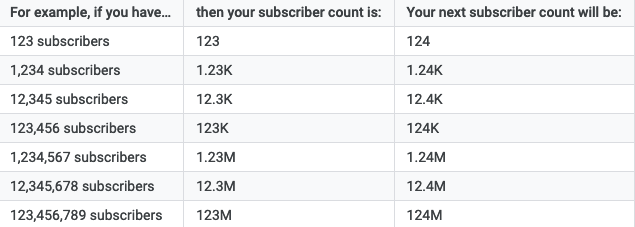
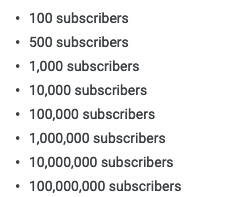
Visitors to your channel see a shortened version of your subscriber count rounded down to the nearest 10, 100, or 1000 subscribers. YouTube Studio provides a handy table showing how your subscriber count will be displayed to viewers.

How to Check Your Subscriber Count on YouTube

YouTube also notifies you within YouTube Studio and via email when you hit certain subscriber milestones.

subscriber count - Youtube milestones

How to Check Your Subscriber Count on Your Podcast

Podcast success goes way beyond subscriber count, but the metric many podcasters want most is how many people subscribe to their podcast. This is often the hardest number to find.

Part of the problem is consumers can use dozens of different podcast apps to subscribe to shows rather than a single platform like YouTube. That means your podcast subscriber count will only ever be an estimate.

Most podcasting platforms, from the free to the pricey ones, provide some way to check your subscriber count. The method (and accuracy) varies by platform. The platform, however, should make it clear how to find this number. It’s usually to the side of where you post your podcast to begin with.

Some podcasting apps release subscriber numbers, though. You can end up with a bit more accuracy this way, but it takes more legwork on your part.

A couple of these are Podcast Addict and Castbox, though both account for about two percent of the market. Multiplying either subscriber count by 50 could give you a vague idea of how many subscribers you have in total, but it won’t give you the full picture.

A final suggestion from The Podcast Host is to publish a new episode and hold back from promoting it on social media, email, or anywhere else. In theory, any downloads occurring within about 24 hours of your show being posted are automatic downloads from subscribers; so if you have 50 downloads within a day of posting your episode, you likely have around 50 subscribers.

How to Check Your Subscriber Count on Social Media

Most social media platforms make your number of subscribers readily available, so finding them is simply a matter of knowing where to look.

Here’s how you can find your subscribers on all of the major social media platforms.

Facebook

How you check your follower count on Facebook will depend on whether you have a private user account or a business page.

Private users can allow people to follow them by turning on public posts and allowing people who aren’t their friends to follow them. This is an excellent option for bloggers and public figures who don’t want to have a private and a business Facebook account.

If this is you, head to the “Friends” tab on your profile page and click the “Followers” sub-tab. This will show you a full list of followers. You can see the total figure even faster by reading the “Intro” section on your profile page.

Facebook Business Page owners will need to navigate to their page, click on the “More” tab and then “Community” in the dropdown menu. Here you can find your total follower count, what your followers have posted on your page, and any posts where your business page was tagged.

Instagram

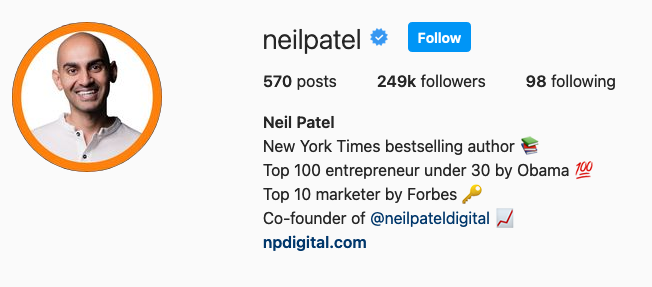
Instagram puts your number of followers front and center. At the top of your profile, you can see how many people you’re following and how many people follow you. Once you get over 10,000 followers, the number will be rounded down to the nearest 100 or 1000 followers.

subscriber count - instagram

If you want to get an exact subscriber count, use Instagram’s Insights tool. Navigate to that section on the app and click on “Audience” to see an exact follower count and a growth comparison with the previous week.

Twitter

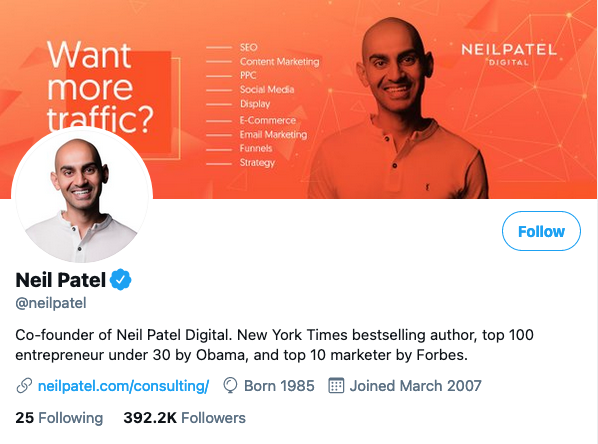
If you have fewer than 10,000 followers on Twitter, you can see exactly how many people follow you by looking at your profile page. If your follower count is higher than that, Twitter rounds the nearest one hundred followers.

Subscriber count - Twitter

To find the exact subscriber count on Twitter, head to the Analytics section and hover your mouse over the subscriber number in the top right-hand corner. An exact count will appear.

Snapchat

The only way to see your subscriber count on Snapchat is to have a Public Profile. Not only will you be able to see your subscriber count on the back-end of the platform, but you’ll also have the option to display your follower count publicly.

TikTok

You need a Pro account to check your subscriber count on TikTok. With this kind of account set up, head to the “Settings” menu and click on “Analytics.” This shows a graph with how many video views you received over the last 28 days and how many followers you have.

Note: You need to wait seven days after creating a TikTok Pro account before analytics data becomes available.

LinkedIn

When I talk about subscribers on LinkedIn, I don’t mean the number of connections you have. I’m talking about the number of followers you have.

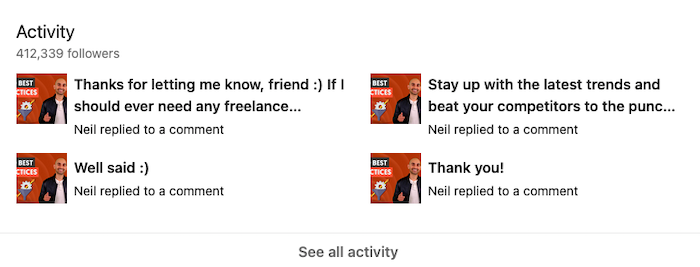
To see how many followers you have, sign into your account and scroll down to find the “Activity” section. There you can see your exact number of followers.

subscriber count - LinkedIn

Pinterest

Track your Pinterest subscriber count on your Analytics dashboard. In addition to your follower count, you can see engagement metrics, popular pins by your fans, referral traffic, other top influencers, and competitor data.

How to Check Your Blog Subscriber Count

People don’t subscribe to blogs in the same way they subscribe to YouTube channels or podcasts. That makes coming up with a subscriber number a little trickier. Here’s what you can do to estimate your subscribers.

  1. Create an email newsletter and see how many people sign up.

    Having an email newsletter is probably the best way to gauge how many people “subscribe” to your blog. However, you need to ask people to enter their email addresses without giving them anything other than your updates in return, as Ahrefs does, for example.

    If you offer them something like a discount on a product you sell, you can’t prove they actually read your blog every week—they may immediately stop reading after they get their discount.

  2. If you already have an email newsletter, count your subscribers.

    Checking your blog subscriber count can be as simple as opening up your email marketing platform and seeing how many people you have on your email marketing list.

  3. If you don’t have or want to send an email newsletter, use Google Analytics.

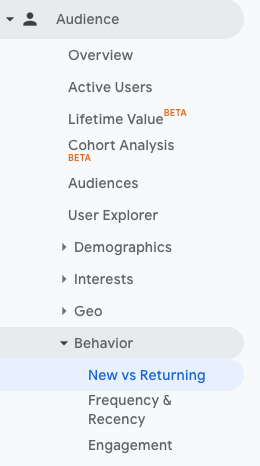
    If you don’t think your email list accurately depicts your subscriber numbers, you can use a Google Analytics report to estimate the subscribers you have. Navigate to the “Audience” tab, click on the “Behavior” dropdown menu, and choose “New vs Returning.”
    subscriber count - Google Analytics
    This will give you a chart that separates new users from returning visitors. I’d recommend taking the data over the last 30 days to get an accurate idea of your subscriber count.

Conclusion

Your subscriber count is certainly worth knowing, but it isn’t the end-all, be-all. Measuring the engagement on your website, YouTube, and social channels is also an effective way to show brands and other potential partners how valuable your following is.

It’s also a great way for you to determine which social media accounts are worth your time.

If you’re still feeling a bit stuck, whether with subscribers or engagement, that’s okay—there are a lot of metrics to take into consideration. For some extra help, check out my guide on how to make social media marketing work for you.

On which platform do you have the most subscribers?

Shopify Vs. Wix

Disclosure: This content is reader-supported, which means if you click on some of our links that we may earn a commission.

As an ecommerce seller, you’ll find yourself making a lot of choices.

Is the clothing niche more profitable than accessories? Which theme would be better: Wokiee or Porto? Is Shopify better than Wix, or is it the other way around?

Of all the questions, choosing the best ecommerce platform remains the most crucial. It’s difficult, though, because a lot of your best options appear to “do the same thing.”

Although Shopify and Wix have overlapping features, Shopify edges forward in the race if you’re specifically looking for ecommerce functionality.

Still, it’s a close call between the two that boils down to your intent. Small businesses or brand-conscious entrepreneurs will love Wix with its easy-to-use, cheap features, and greater design flexibility.

But if you want a powerful online store, Shopify can do a lot more. So long as you’ve got a bigger budget and the technical knowledge to flatten the learning curve, Shopify is going to be the better long-term ecommerce solution.

Shopify or Wix: Which Is Better?

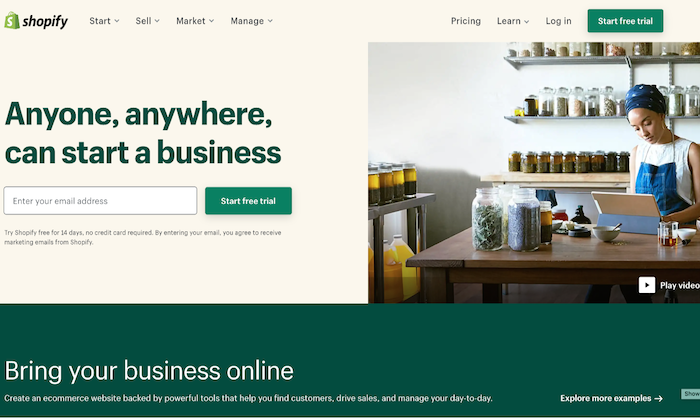
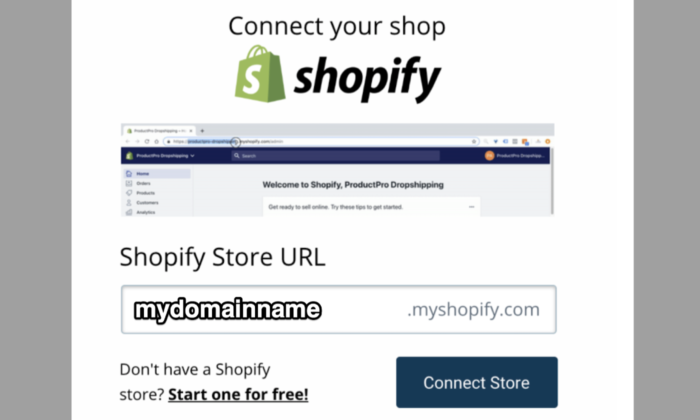
Shopify is a solid option for ecommerce applications with its fully responsive templates, AMP support on product pages, and dropshipping features. It also supports multi-currency selling functionality and offers useful integrations with other essential apps.

Overall, it’s a more professional choice for anyone who wants to build an online store. If this is exactly what you’re looking for, make sure you sign up for a free trial ASAP.

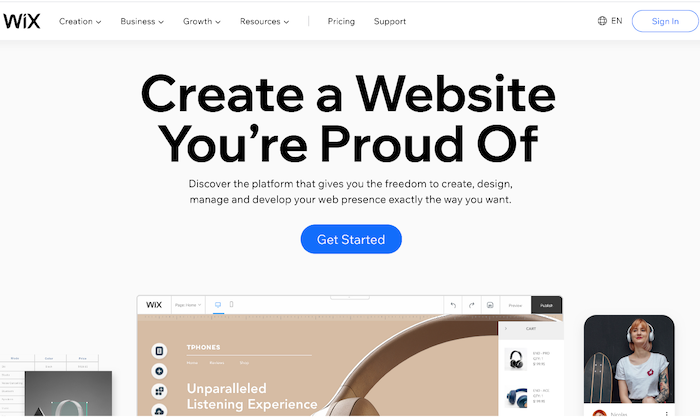
Wix has a drag-and-drop interface and a wide range of bundled templates, making it a great choice for those who want to build a general-purpose website. It also comes loaded with page layout tools, data capture, and email marketing features.

Plus, it’s cheaper, and you don’t have to worry about paying transaction fees. Ready to check out Wix? Give it a try with a free trial.

A Review of the Best Ecommerce Platforms

People want to dabble with good ecommerce platforms considering their rising popularity. But what’s the best one out there?

We reviewed dozens of ecommerce platforms and narrowed them down to the seven best options that tick off all the right things on an ecommerce seller’s checklist. Wix and Shopify both made the list.

Head over to our best ecommerce platforms guide for an in-depth look at where every product stands, along with what criteria do we think they are best for.

Shopify Wins 

Useful Ecommerce Features: As it’s specially designed to be for ecommerce, Shopify sites come with many useful ecommerce features to cover every little aspect of the sales process. It has multiple payment gateways, inventory management tools, third-party platform integrations, and shopping carts. The platform is also scalable, allowing you to grow with your expanding business needs.

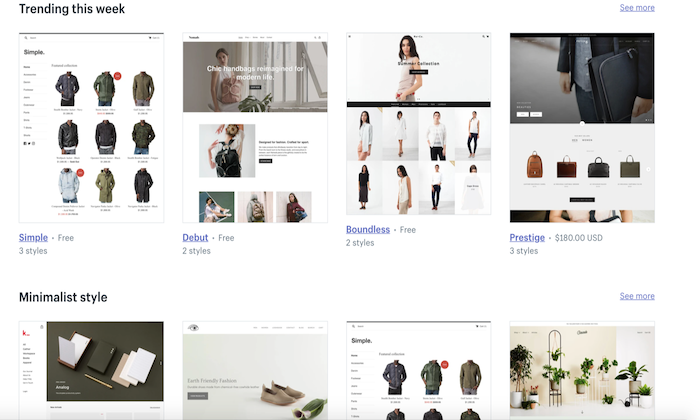
Fluid Themes and Greater Flexibility: Shopify offers 60+ professionally-designed and customized themes, giving you the liberty to add individual product pages based on your needs. Moreover, this customization and flexibility extend to changing page elements too. You can move, add, remove, or resize page elements to make your shop more on-brand.

Tweaking themes is also possible—provided you know HTML and CSS. If you’re tired of how your site looks, you simply have to choose a new theme, and you’ll have a brand new store within minutes!

Custom Domain Name: Every Shopify user gets a custom domain name that allows them to brand their respective stores and online business more efficiently and effectively. You can handle your domain on the same site location as your domain store, which, in turn, allows you to make changes to either with ease while simultaneously managing your domain.

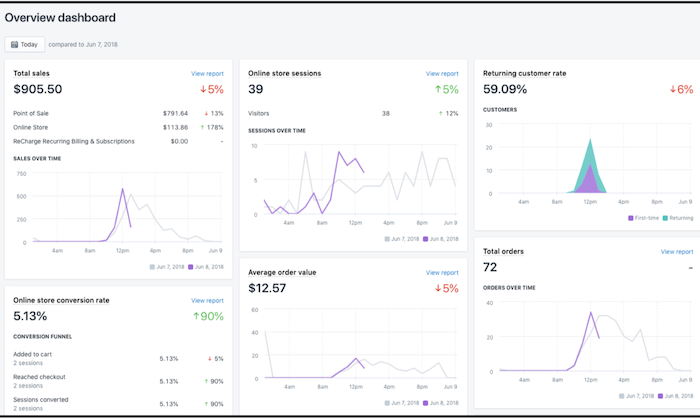
Excellent Built-In Analytics: Shopify goes the extra mile by offering you plenty of built-in analytics features like Google Analytics, customer behavior, stock levels, and conversion tracking to know exactly how your store is doing and which aspects need a bit of tweaking for better results.

You can also view online store sessions, total sales, top-selling products, returning customer rate, average order value, and behavior reports (phew!) on the platform to make better decisions.

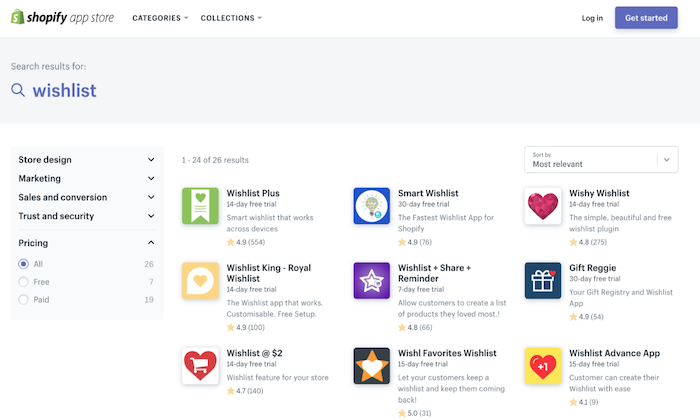
Shopify App Market: Nearly every ecommerce plugin and feature are developed for Shopify first due to its vast popularity. Whether it’s free or premium add-ons for marketing to content management, you get all kinds of unique features with this platform. Case in point: An augmented reality feature that allows you to use your smartphone to navigate the product and see every little detail.

What’s more, even other marketplaces like AliExpress and Oberlo offer compatible apps to make your store management easier.

Faster Checkout Options: Shopify has prioritized customer preference when designing login and checkout options. You can make the registering of users before heading to checkout mandatory, optional, or prohibited. Plus, registration is also incredibly easy as users only have to fill out basic information. As a seller, you can add users manually or import the list via CSV and sort them through a tag system.

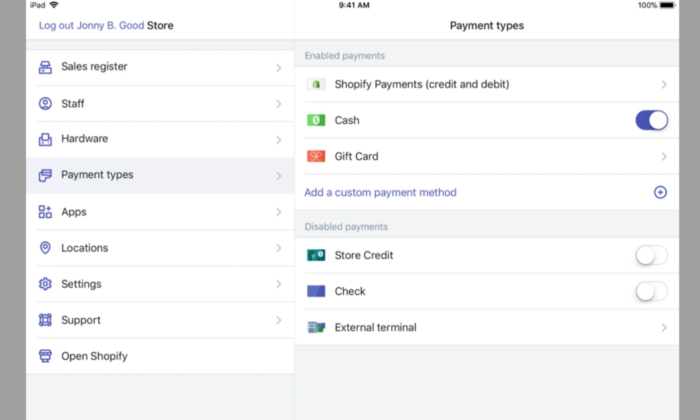
More Payment Options: Shopify gives you several options to sell items anywhere in the world thanks to its Amazon FBA or a 3PL order fulfillment support, along with multiple-currency support through a complex, non-supported HTML, CSS, JavaScript, and Liquid hack. This may not be ideal, but it’s definitely there. You also get direct access to 100+ different payment gateways, including PayPal, Stripe, and Shopify’s fully integrated payment system.

No Cap on Products and Inventory: Most web servers or external platforms restrict the number of products you can add to your store—but not Shopify. You can add unlimited products to your Shopify store. Even the lowest subscription package does not put any restriction on the number of products you can add to your inventory.

Shopify Losses

Learning Curve: Shopify developers claim the platform is the best for creating and managing online stores, but they don’t claim to be the easiest, and rightfully so. Although Shopify uses templates that eliminate the need to edit HTML code and CSS styling, its websites are harder to edit than Wix. It’s because the focus is on the products and how you present the page. If you want to make additional changes, you’ll have to learn to edit the backend code.

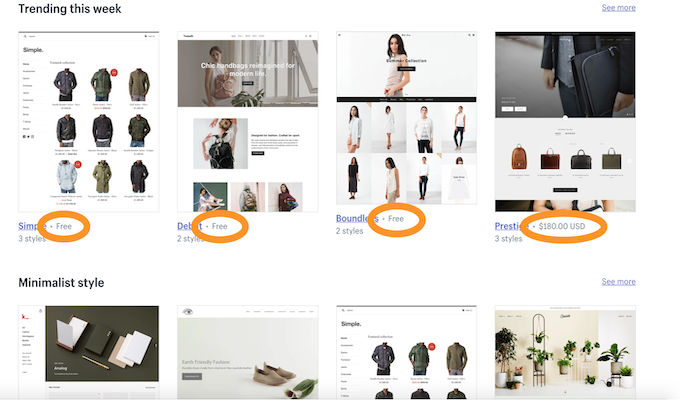
Limited Free Themes: While we love how modern and responsive Shopify themes are, it’s the limited number can restrict your options. You have to pay a one-time fee for most themes, ranging between $140 to $180, as only ten themes are free.

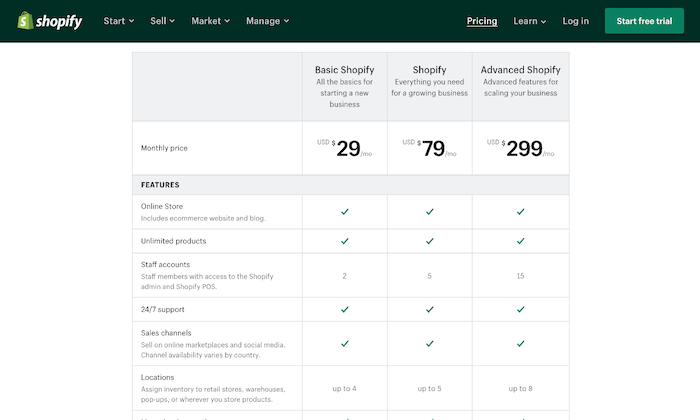
Expensive: Shopify gives you a wide range of subscription plans starting at $29 per month. However, not only is it more expensive, but you also don’t get a free plan (only a 14-day free trial). The basic plan includes only the barest of features, so if you want access to advanced features like fraud analysis and reports, you have to pay a higher price.

Further, unless you use Shopify Payments—something that isn’t available everywhere—you have to pay a transaction fee on top of the payment processor fee.

Lacks Email Hosting Facility: You don’t get an email hosting feature despite web hosting being included in all Shopify plans. So, you can’t host a domain-based email address like info@shopname.com. What you can do, however, is set up email forwarding. This will forward all emails sent to info@shopname.com automatically to your regular email account. You’ll have to set up other third-party email hosting connections to use the email forwarding function.

Wix Wins

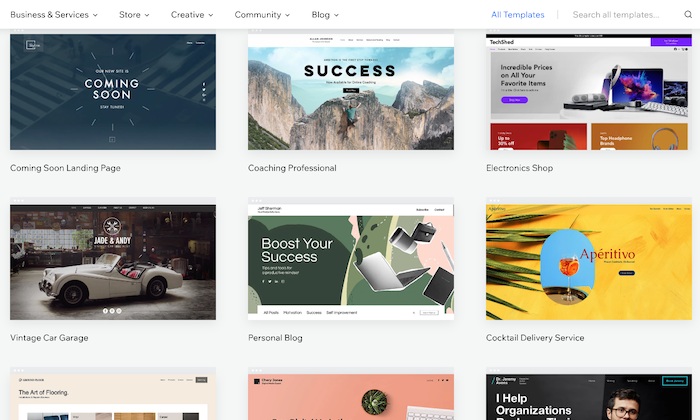
Massive Template Collection: The basic Wix editor lets you pick from 500+ beautiful templates for your site and populate it with any content of your choice. There are several built-in dynamic templates—from homepages to blogs to landing pages—suitable for novices and experts. People on a tight budget will be happy to know the platform offers 60 completely free, modern, and stylish ecommerce templates.

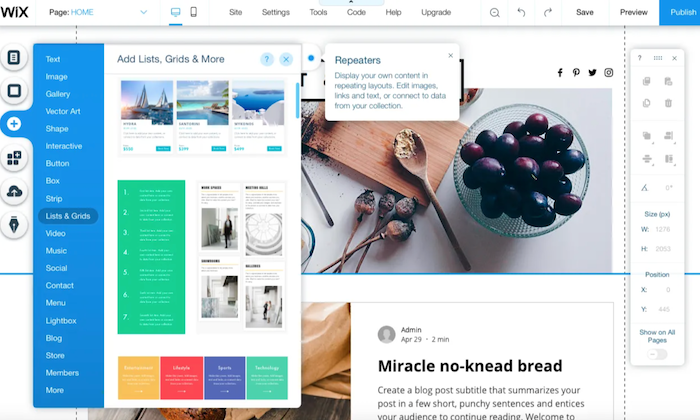
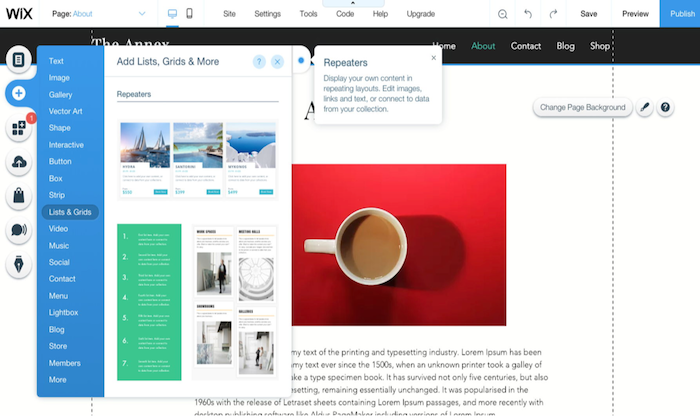
Intuitive Drag-and-Drop Interface: The drag-and-drop interface is the heart of Wix, making it incredibly user-friendly. Because of this, not only people with all levels of skills can use the platform, but it also gives you enough options to convert your side into a real powerhouse by extending its functionality. You can use the mobile editor to review and edit your site to optimize it for mobile devices.

Free Plan: Wix is definitely the cheaper platform, with prices starting at $23 per month. There’s also an entirely free plan and a free domain name facility (for the first year) that further boosts its appeal. Plus, you don’t have to worry about paying any extra fees with the platform.

Built-In Video Function: Wix seriously lets your products shine, which is one of its biggest USPs. It has a built-in product video function that helps improve customer experience by allowing them to see the product live. You’ll also appreciate the product zoom feature and the fact you can build a distinctive checkout page to make the checking out process as hassle-free as possible.

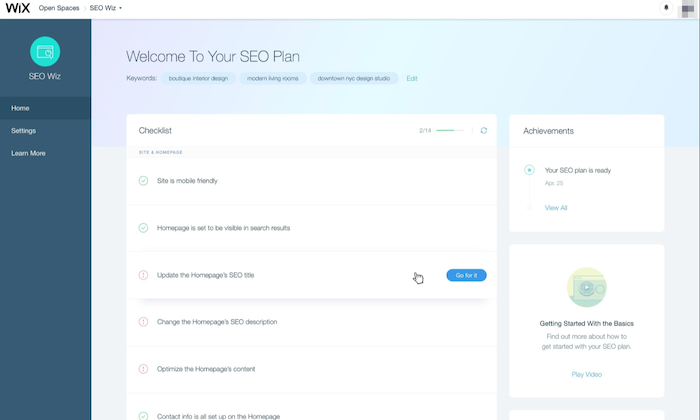
Efficient SEO Guidance: Wix helps you optimize your ecommerce site for SEO by highlighting areas that require your attention. It then does the hard work by letting you fill in keyboard tags and other metadata. You can also modify the URL of each page, so it best fits what Google needs to know.

Tons of Extra Features: Aside from the core functions, Wix is built with an entire ecosystem of useful tools and products to make website building easier. It offers your free HTTPS to ensure visitor interactions with your website remain secure, templates to create quotations for customers, and integrated payment options like PayPal and Stripe. There’s also a logo maker to make branding even easier!

Online Store Integration: You can include an online store with your website at no additional cost with Wix. As the interface is easy to use, the integration process is very straightforward, and you don’t even require an external shopping solution.

Wix Losses

Harder to Redesign: The intuitive drag-and-drop interface of Wix makes designing your site simple, but it’s the redesigning where you have to pay the price. You don’t have the flexibility to make any major changes by just selecting a new theme. Instead, the redesigning process is extremely manual. If you want to make any drastic changes to your online store, you practically have to rebuild your entire website. Besides that, you don’t have access to HTML and CSS, which makes the overall process more time-consuming and tough.

Limited Integration With Third-Party Apps: When we talk about app integrations, it isn’t even a fair fight as Wix has far fewer ecommerce developers creating apps for its platform. For instance, you won’t find a Google Shopping Feed or Facebook Product Feed. This means you can’t run Google shopping ads or run dynamic product ads on Facebook from the platform. Native integration with email marketing applications is also absent, making it troubling for owners who rely on email marketing for revenue. The only way you can integrate a Wix store to an email marketing add-on is to use either Zapier or write the code yourself.

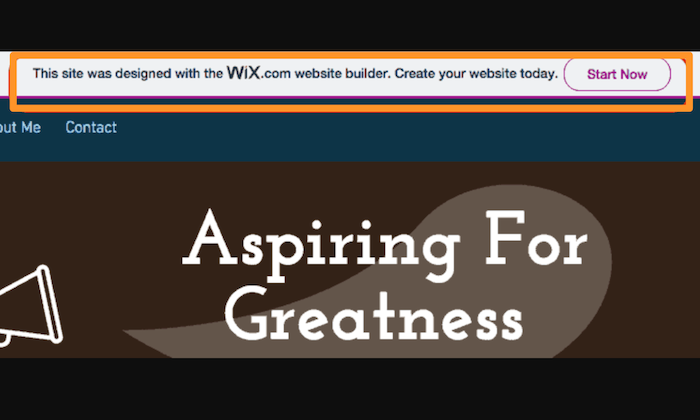
Forced Wix Branding: They say there’s no such thing as a free lunch, and Wix very well proves it. If you decide to choose and stay on Wix’s free plan, be prepared to carry Wix branding—right at the top of your site. It isn’t too obnoxious, but it isn’t exactly discreet. What makes it more annoying is it appears before your website header!

Non-Transferrable Site: While some may justify Wix not wanting users to export websites created with their technology, it’s a con for those who want to migrate. And the fact that scalability isn’t Wix’s biggest forte, makes this an even bigger problem. If you want to recreate and transfer your website away from Wix, you have to pay some serious amount of cash. In short, if you sign up for Wix, they might just have you for life.

Comparing the Top Ecommerce Platforms

While Shopify and Wix are excellent ecommerce platforms, there are several other alternatives with their own advantages. Make sure you check our top picks for the best ecommerce platforms to find the right option based on your specific needs.

  1. Wix – Best for flexibility and customization
  2. Squarespace – Best ecommerce platform for creatives
  3. Bluehost – Best for hands-off WooCommerce store setup
  4. BigCommerce – Best for medium to large stores
  5. Shopify – Best all-in-one ecommerce platform
  6. WooCommerce – Best for WordPress websites
  7. OpenCart – Best for selling digital products 
  8. Ecwid – Best for integrating with your current platform

Summary

Shopify is the more obvious choice since we’re concerned with ecommerce functionalities in particular. But that doesn’t mean Wix has lost its charm.

Shopify is the best solution for sizable online stores that need all the bells and whistles of scaling and selling everywhere around the globe, while Wix is more appropriate for general-use cases and for owners who rely on content creation to acquire more traffic. It also offers more creative freedom as opposed to Shopify.

In the end, the choice is yours—just make sure you make the right one.

Best SSL Certificate Provider

Disclosure: This content is reader-supported, which means if you click on some of our links that we may earn a commission.

You want people to trust your site, and that requires a valid secure sockets layer (SSL) certificate.

SSL certificates are issued by a certificate authority (CA) and they build trust in two important ways:

  1. The CA authenticates the identity of the organization that wants the certificate. This way, people know that they are in fact sending their information to PayPal, for example, and not someone who has set up a fake PayPal site.
  2. The SSL certificate encrypts the data travelling between your website and visitors. This way, potential attackers can’t steal the information people share on your site, such as their username, password, or credit card number.

Today, all of the popular browsers like Google Chrome will warn users anytime they attempt to visit a site without an SSL certificate. It’ll say something like “This site is not secure,” or “Any information you share may be vulnerable to attackers.”

It’s not great for business, to put it lightly. 

Would-be visitors are going to head to a different site where they feel comfortable entering their credit number. I know I would.

There are a lot of different CAs to choose from and they sell a range of SSL certificates designed to help companies establish their online identity and protect their customer’s privacy.

For some people, going with a free SSL certificate is going to be fine. All that’s required is a quick demonstration that you control a particular domain. These are known as DV (domain validated) SSL certificates.

But they are not enough to protect a major website or online store.

For companies that need to establish a greater level of trust, OV (organization validated) or EV (extended validation) SSL certificates involve real-world background checks on the organization making the request. 

The rigorous authentication process isn’t free, but it conveys a much higher level of trust.

Paid SSL certificate providers also make the process of obtaining and renewing certificates much easier through an intuitive online platform.

So, how do you choose the best SSL certificate provider?

It can seem tricky at first, given that they are all selling the same essential service. There are important differences, though, and you want to figure them out before you decide.

In this post, I’ve reviewed the top SSL certificate providers. These are big names with a long history of protecting websites. The reviews are followed by a short guide that will help you make sense of your options and ask the right questions moving forward.

#1 – SSL.com Review — The Best for Budget-Friendly SSL Certificates

SSL.com is perfectly suited for small and growing businesses that need to secure their sites, but can’t afford to spend thousands of dollars a year.

They are a mid-range product which works for companies that have outgrown their ability to use free SSL certificates, but don’t have especially complex security needs that justify the premium pricing of DigiCert or GlobalSign.

The best part about the budget prices is that the level of encryption is the same as you get with much more expensive SSL certificates. 

You might think that the downside would be lower-quality customer service, but nothing could be further from the truth.

SSL.com offers 24/7 chat, email, and phone support. In review after review, happy customers have thanked their SSL.com customer service agent for walking them through installing their first SSL certificate or helping them handle a complex issue.

I think SSL.com has struck a good balance between price and customer service. It’s not dirt cheap, by any means, but it’s certainly less expensive than some of the enterprise-focused SSL certificate providers.

Along with affordable pricing, SSL.com offers a range of certificates flexible enough to accommodate the needs of many different businesses:

  • Basic SSL: starting at $36.75/year (domain validation)
  • Premium SSL: starting at $74.25/year (comes with three subdomains)
  • High Assurance SSL: starting at $48.40/year (organization validation)
  • Enterprise EV SSL: starting at $239.50/year
  • Wildcard SSL Certificate: starting at $224.25/year
  • Multi-domain UCC/SAN: starting at $141.60/year
  • Enterprise EV UCC/SAN SSL: $319.20/year

Like other SSL certificate providers, you have to sign a longer contract to get the lowest price. With SSL.com, however, the single-year pricing still comes in lower than competitors.

As you can see above, SSL.com has really low rates for wildcard and Subject Alternative Name (SAN) certificates. This can save a ton of money and streamline certificate management.

Wildcard certificates cover an unlimited number of subdomains. Instead of buying, installing, and renewing a separate certificate for neilpatel.com, info.neilpatel.com, and so on, I just need one Wildcard.

SAN Certificates protect multiple domains. The exact number depends on the SSL certificate provider. More domains covered with fewer certificates will make your life much easier.

Just for comparison, GlobalSign’s EV SSL certificate starts at $599 and it costs extra to add domains and subdomains from there. 

With SSL.com, on the other hand, the Enterprise EV UCC/SAN SSL lets you secure up to 500 additional domains for a lot less money. And with GlobalSign, you are limited to 100 additional subdomains per SAN certificate.

Compared to Digicert, the difference is more pronounced as a multi-domain EV is nearly $3,000 per year.

If you think that SSL.com is coming in at the right price for you, give it a shot. The 30-day unconditional refund is not a marketing gimmick. If you are not happy, they will credit your account immediately. Get started now.

#2 – GlobalSign Review — The Best Managed SSL for Enterprise

GlobalSign is the SSL certificate provider of choice for large organizations with complex needs. They have some of the highest rates in the industry, but also some of the happiest customers because of the quality of their service.

If you just need a couple SSL certificates, I would go with something less expensive. On the other hand, if you need a lot of certificates, and managing so many of them is starting to cause problems, then GlobalSign is a wise choice.

Its best-in-breed certificate monitoring and inventory tool, combined with heavy discounts for volume licensing, reduces the total cost of ownership for complete SSL security.

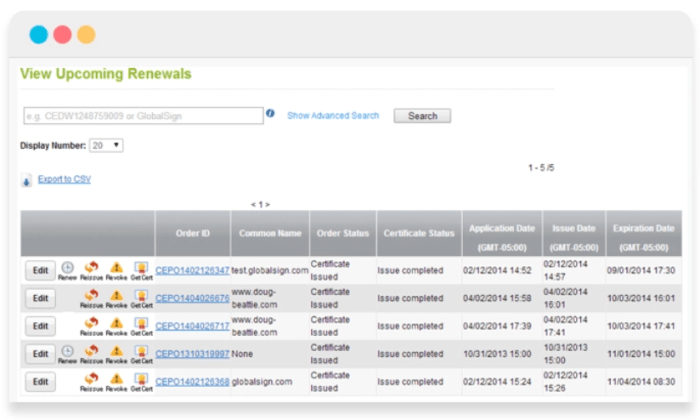
Decrease the frequency of the costly problems associated with certificate expiry, regardless of how many you have to manage. You can even set policy preferences and receive reminders when certificates aren’t compliant, regardless of who issued the certificate.

No more having to track down certificates manually. Everything is available with a quick scan.

Think about it. If your staff saves an extra couple hours each month due to GlobalSign’s intuitive platform and concierge support, then the service has already paid for itself.

I highly recommend GlobalSign for businesses that can’t play the normal waiting game to get new certificates. After GlobalSign authenticates your business, they can issue certificates virtually on-demand because they have pre-vetted all domains.

The initial authentication process is fairly quick (between three and four business days for EV). Some people have reported being able to get certificates quicker due to emergency situations simply by calling up GlobalSign.

GlobalSign offers the full range of traditional SSL certificates:

  • DV SSL certificate: starting at $249/year
  • OV SSL certificate: starting at $349/year
  • EV SSL certificate: starting at $599/year
  • DV Wildcard SSL certificate: starting at $849/year
  • OV Wildcard SSL certificate: starting at $949/year

GlobalSign offers SAN SSL certificates for multiple domains at $199/year on top of the base certificate price. So, an OV SAN SSL from GlobalSign would run you $549/year. A single SAN certificate will cover up to 100 additional domains.

You can choose to add subdomains for an additional cost, as well, though a wildcard SSL certificate will be more cost effective if you need coverage for a lot.

The warranty for the GlobalSign EV tops out at $1.5 million. If your digital certificates don’t provide the protection promised, GlobalSign will foot the bill for damages. 

This is half a million less than a comparable certificate from DigiCert. Ideally, you’ll never have to worry about the difference, but it’s something to be aware of.

Another nice aspect for enterprise customers is that GlobalSign supports document signing, code signing, digital signatures, and secure email. Being able to centralize all of these SSL security concerns in a single platform can make managing them much easier.

GlobalSign also offers intranet SSL for securing internal servers and applications. This means companies no longer have to run their own CA or use self-signed certificates.

For companies that provide cloud-based services, GlobalSign’s CloudSSL can help them meet the complex security requirements of these next-generation environments. 

Not every company will realize the benefit from GlobalSign’s premium suite of managed SSL certificates and services. For simple websites, it’s overkill.

But for enterprises, especially companies with complex SSL security needs, going with GlobalSign is worth every penny.

Request a GlobalSign managed SSL demo today, and see the difference it makes. 

#3 – DigiCert Review — The Best for Premium SSL Certificates

Digicert Group owns a handful of the most trusted CAs (GeoTrust, RapidSSL, Thawte, and Verisign) and has become one of the largest SSL certificate providers in the world.

It’s one of the more expensive options, for sure, but Digicert includes security features with its premium SSL certificates that can make a huge difference for the right businesses. 

This includes automatic malware detection across all your sites, PCI (payment card industry) compliance scans, and blocklist checks, which ensure that your site isn’t under suspicion on any government or country-specific blocklist.

Importantly, most of these features only come with Digicert’s higher-tier plans. The provider breaks down its offerings into three tiers: Basic, Secure Site, and Secure Site Pro.

You can buy different types of certificates for each tier, but I don’t recommend going with Basic. It costs a lot more than comparable protection from other SSL certificate providers and you miss out on the extra security features that make Digicert’s premium pricing a good buy.

If you need the basic domain validation that comes with Digicert Basic, I’d go with SSL.com. On the other hand, if you are running an ecommerce website where users are entering financial information, Digicert offers a high level of protection that is very appealing.

At the Secure Site tier (which comes with organization validation), pricing breaks down as follows:

  • Secure Site SSL: starting at $399/year
  • Secure Site EV SSL: starting at $995/year
  • Secure Site Multi-domain SSL: starting at $1,296/year
  • Secure Site Multi-domain EV SSL: starting at $2,785/year
  • Secure Site Wildcard SSL: starting at $1,999/year

All Secure Site certificates are backed by a $1.75 million Netsure Protection Warranty for your businesses, and a $2 million aggregate Relying Party Warranty for your customers.

This is one of the most comprehensive warranties out there, and this isn’t even the premium DigiCert plan.

You also get priority support, which means that Digicert agents will respond to your concerns faster than they would if you went with the Basic tier. Another good reason to avoid that.

Of course people still run into issues, but Digicert customers with priority support constantly praise the company for their responsiveness and expert advice.

The company really does walk their customers through the installation process for free. They expect you to have questions and they are ready to help.

All of this and more comes with the SecureSitePro tier:

  • Secure Site Pro SSL: starting at $995/year
  • Secure Site Pro EV SSL: starting at $1,499/year

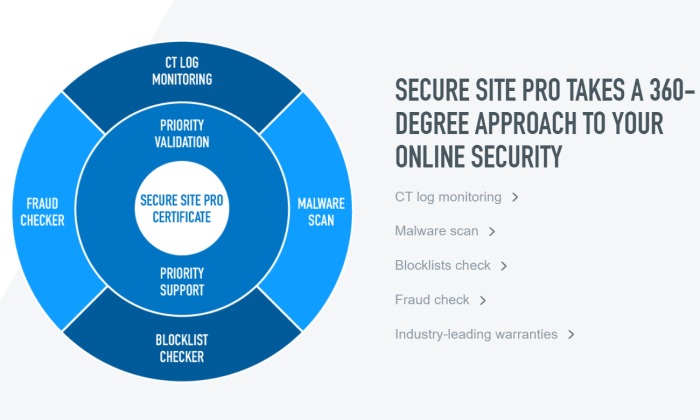
These plans are backed by a slightly better warranty, which covers your business up to $2 million. There’s also certificate transparency log monitoring that alerts businesses whenever an unauthorized certificate is assigned to one of their domains.

In addition to priority support Secure Site Pro also includes priority validation, which cuts down the time it takes to issue new certificates.

Not every company needs the extra security, but those that do will appreciate the totality of what Digicert offers with its Site Secure Pro certificates:

All Digicert certificates are managed via CertCentral, which is remarkably easy to use. CertCentral is designed to work at scale, so it doesn’t matter how many certificates you have—it’s going to be easy to manage.

Digicert backs all of their SSL certificates with a 30-day, money-back guarantee. No questions asked, no hassles. 

What I Looked at to Find the Best SSL Certificate Provider

You want people to know, without a doubt, that your site is safe and trustworthy.

The exact range of SSL certificates and capabilities you need will depend on the type and number of websites your company operates.

Price is an important factor—especially when you look at long-term costs—but it can’t be the only thing you focus on. In a very real sense, you get what you pay for. 

Some companies will be completely covered by the bargain SSL certificates. Others will be extremely grateful they went with a premium product that really delivers the security they need.

To find out which SSL certificate provider is going to work best for your specific situation, pay attention to the following X criteria as you evaluate your options.

Types of SSL Certificates

You want to get the right type of SSL certificates for your site. Understanding the basic differences between them will help you avoid buying more than you need, or not getting enough.

There are three types of SSL certificates you’ll encounter. They vary according to validation level:

  • Domain Validated (DV): DV certificates show that the certificate authority has validated that you are the owner of a particular domain. These are typically free, but since you don’t have to demonstrate anything beyond control over a domain, they have the lowest level of trust.
  • Organization Validated (OV): OV certificates show that the certificate authority has validated that your organization is real, has a known physical location, and controls the domain. These are not free and may take several days to acquire, as they require a real-world identity check. As such, OV certificates have a higher level of trust than DVs.
  • Extended Validation (EV): EV certificates have the most extensive validation process. In addition to checking everything required for an OV, an EV also requires the examination of corporate documents.

Generally speaking, different types of SSL certificates from the same provider will have the same level of encryption. It’s the authentication process that adds the extra level of trust.

The encryption that comes with DV certificates is key. But when encryption is tied to the rigorous identity check of and OV or EV certificates, it becomes much harder for bad actors to carry out phishing or man-in-the-middle attacks.

In some industries, like finance and healthcare, you may have to get an EV SSL certificate. This is just a bullet to bite. This is also true if you have a high-profile website that could be a juicy target for attackers.

Some choose to get OV or EV certificates for branding purposes. This was more important when browsers like Chrome showed a green padlock next to the site’s URL. 

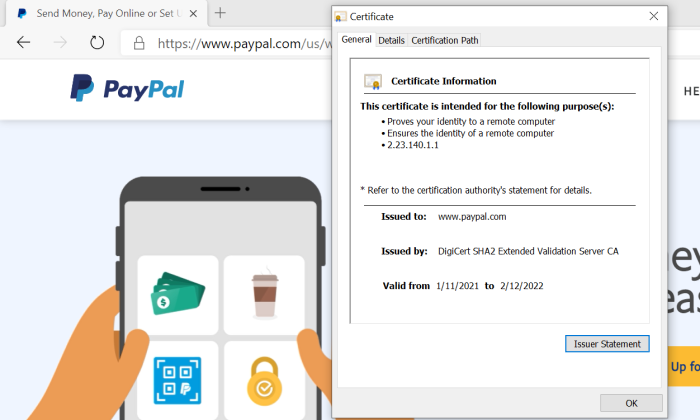
Google started phasing that out and now everyone gets the same gray padlock, regardless of the type of validation. Even PayPal doesn’t have a green lock in Chrome any more:

There is, of course, more information about the organization in the certificate details if you get an OV or EV, but who is checking that?

If you can avoid paying for OV or EV, I recommend doing that. Just check to make sure that it’s going to work for your industry and with any payment gateway software you use.

In terms of picking between different vendors, be sure you are making an apples-to-apples comparison. 

For example, Secure Site SSL from Digicert is an OV certification, though it doesn’t say so by name, whereas a Single Domain OV certificate from Sectigo makes it more obvious.

Speaking of single domain certificates, there are two important subtypes of SSL certificates:

  • Wildcard SSL certificates cover an unlimited number of subdomains.
  • Subject Alternative Name (SAN) SSL certificates cover a certain number of additional domains. These may also be called “multi-domain” or UCC (unified communications certificate).

The exact limitations will vary from provider to provider. With GlobalSign, for example, you purchase the type of SSL certificate you want (DV, OV, or EV) and then pay an extra $199/year for every additional domain, and $99/year for each subdomain.

Alternatively, GlobalSign offers a Wildcard SSL that will secure an unlimited number of subdomains for $849/year.

If you need to secure multiple domains or lots of subdomains on a tight budget, I recommend SSL.com. They have Wildcards starting as low as $225 and SAN certificates that can secure up to 500 domains for $142/year.

One final note: it’s possible to use multiple certificate providers. Many company’s use free SSL certificates from Let’s Encrypt for everything they can, and use paid SSL certificates to cover everything else.

Speed to Issuance

How fast can you get the SSL certificates you need?

While DV SSL certificates can be issued more or less instantly, the OV and EV SSL certificates can take several days and possibly longer.

If you need one of these higher validation certificates badly, then definitely go with an SSL certificate provider who promises in the 1-3 day range, like DigiCert. Of course, you’ll want to check the reviews to see if they walk the walk when it comes to shipping certificates quickly.

SSL.com has some of the fastest turn-around-times, judging from reviews, so they can be a good choice if you need an SSL certificate yesterday.

For companies that develop software, Digicert and GlobalSign solve the problem of issuing certificates at the speed of DevOps. 

They set up an enterprise account which lets you pre-validate domains. With Digicert and Globalsign, this is simple to manage, so you pre-validate as many domains as you think you might need, and certificates can then be issued on-demand.

Warranty Policy

One of the major benefits to going with a paid SSL certificate over a free one is that you are covered by a warranty. It’s like an insurance policy. If an incorrectly issued SSL certificate causes problems, you won’t be on the hook for making it right.

These warranties vary depending on which type of certificate you choose. DV SSL certificates are backed by warranties of around $10,000, whereas EV SSL certificates may cover more than $1 million.

DigiCert has one of the most comprehensive warranties. For their EV SSL certificate, your business is covered by a $2 million warranty and your customers are backed by a separate $2 million warranty.

Hopefully you will never need this, but if you do, it’s important to know which companies are backing you with a suitable warranty.

Customer Service

Whether you are purchasing a single SSL certificate or thousands a week, the quality of customer service matters a lot.

There can be a lot of steps to installing and renewing SSL certificates. It’s a little different for every host and type of server. Sometimes the “easy installation” process is going to be more difficult based on your specific hardware.

Being able to pick up the phone and talk to an expert who can walk you through the process is worth a lot. SSL.com has a great reputation, with hundreds of reviewers describing reassuring customer service throughout their first installation of an SSL certificate. The agents stay on the line, from start to finish, ensuring that everything is done right.

Let’s Encrypt is a great option for free SSL certificates, but are you saving money if it takes your paid employees several hours a month to finagle with an unfamiliar system?

This is why companies like GlobalSign and Digicert can charge a lot more for SSL certificates than others. You are paying for the on-demand, concierge customer service so that you don’t have to hire experts yourself.

Conclusion

If you can’t use the best free SSL certificates to protect your sites, it’s important to find the right paid option.

Much is going to depend on finding an SSL certificate provider who offers the range of certificates you need at a price that makes sense. My recommendations are a good place to get started:

  1. SSL.com – Best for budget-friendly SSL certificates
  2. GlobalSign – Best managed SSL for enterprise
  3. DigiCert – Best for premium SSL certificates

For companies looking for affordable SSL certificates, make SSL.com your first and only stop. On top of their excellent prices, they have a great reputation for helping their customers. If you need a Wildcard or SAN certificate, going with SSL.com could save you thousands of dollars each year.

If you only need OV or EV certificates, and you want a serious warranty to back them up, Digicert is a great choice. There’s definitely a higher price tag, but the platform comes with many additional tools to maintain top-level SSL security across all of your sites.

GlobalSign is my recommendation for enterprise customers who want a provider that helps them manage their complex SSL needs. There is no more user-friendly certificate management system out there, and you can depend on their customer service agents to be there when you need them.

There are many, many more options out there for SSL certificates. These are my top three. They have stood the test of time, helped thousands of companies keep their sites secure, and continuously evolve their technology to stay on top.

To recap: